


How To Frame Your Family Photo Collection: Part 1
Family photo collections are not meant to sit in a box or collect dust in storage! This summer, dust off the cobwebs and make your family photo collection a DIY project you will cherish forever. This week, I'm walking you through how to get your family photos out of storage and onto your walls where you can see them every day. Surprisingly, this was a super simple (not to mention, inexpensive) project that you can recreate in your own home. When my grandmother passed, I was lucky enough to inherit many of her most cherished belongings. The most incredible by far was her wedding album.
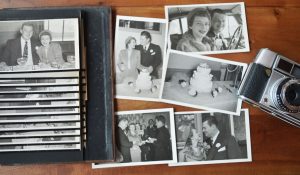
When I was younger, my grandparents were the most amazing people to me. Every Sunday during our visits, my grandfather would teach my siblings and me how to play poker while my grandmother prepared the most incredible dinner. Every week they greeted us with so much excitement as though they hadn't seen us in years. At the end of the night, as we pulled away in our perfect 1980s wood-paneled mini-van, they'd stand at their front door and wave until we were completely out of sight. They were the most perfect grandparents a kid could ask for. My grandfather passed when I was much younger, but I was able to be with my grandmother for years after, learning more and more about who she was, who she wanted to be when she was my age and her amazing relationship with my grandfather. So when she passed and I was given their wedding album, I was completely taken aback and elated to see not only how perfect they were as grandparents, but to also see how perfect they were for each other.
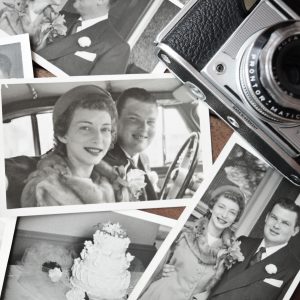
One of the most amazing (and surprising) things about seeing their wedding was how non-traditional it was. No white dress, no walking down the aisle. It was a very small affair - they only invited their closest family members to witness their special day - an intimate celebration of their relationship at their home in Virginia- and the photographer on this day (who I will never know) snapped so many moments that capture just how perfect my grandparents were for each other. The best way to honor my grandparents who meant so much to me was to take their wedding album that had for years collecting dust and display their perfect wedding photos on my walls.
There are two ways to frame vintage photos depending on how you want to display them: matted and floating. Below is the process of custom framing your photos under a mat. (Floating tutorial coming soon)
First, if you wish to matte the photos over their borders, you can custom frame your photo to fit perfectly under a single, double, or triple-layered mat. Here are the steps to take if this is your preferred framing style. Let's get started!
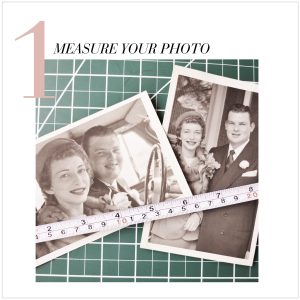
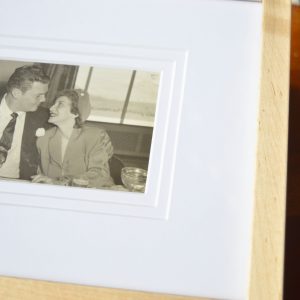
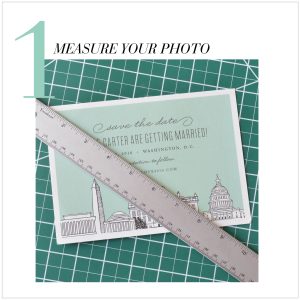
For a matted image, measure the length and width of each photo just inside the borders - this is where the mat will sit to perfectly cover the border. This is the measurement you will insert into the "Opening Size" option when creating your custom frame.

For a matted image, the "Opening Size" should measure the total image size as outlined by the borders. If you measure beyond the borders, the mat will expose the border and the project won't look as clean. The Opening Size for my project came to 5 x 3.
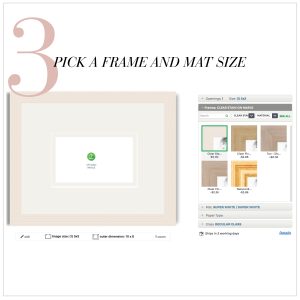
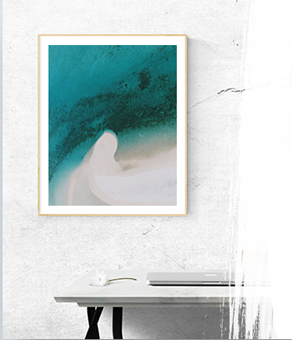
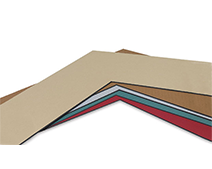
For my photos, I chose a Super White Triple Mat with a Clear Stain on Maple Frame. A white mat with a neutral frame is a great choice to let the photo speak for itself. Want to recreate this look? You can find the maple frame here!
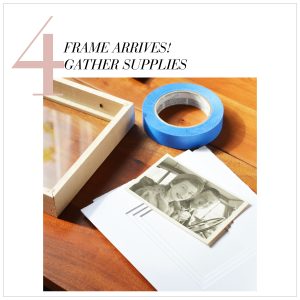
When your frame arrives, remove the backing and gather supplies. For a matted frame, you'll need the frame, mat, backing, photo, and tape. (For my project, I chose to use painter's tape which will hold the photo in place but can be easily removed without damaging the photo)
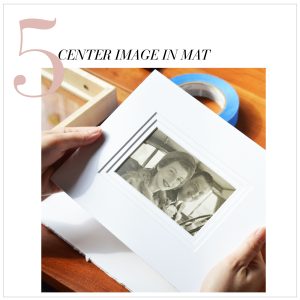
Place your photo behind the mat and align it to hide the frame borders. Position straight and hold firmly to assemble in place.

Once you have your photo positioned the way you wish to display it, carefully flip the mat over. Try to avoid moving your fingers or sliding the photo out of place.
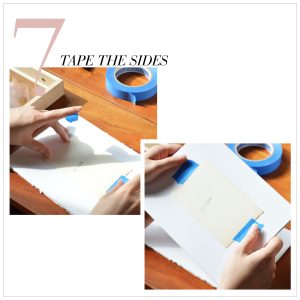
On the back of the mat, place two pieces of tape on the sides to secure it into place.
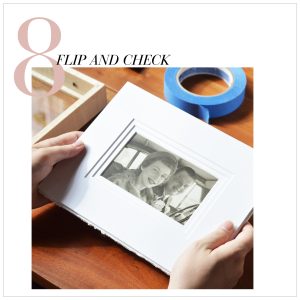
Flip the mat board back over to make sure your photo remained perfectly aligned with the mat. If it shifted during the process, this is the time to repeat steps 6 and 7.
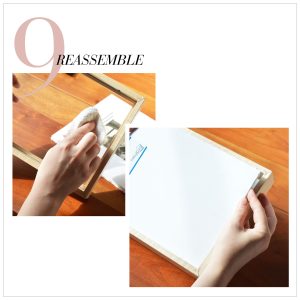
If your photo looks aligned, it's time to reassemble in the frame! Be sure to clean the glass on the interior of the frame to keep dust from dirtying the photo and mat. Once your glass is clean, place the mat and backing into the frame and secure the back tabs to hold everything in place.
If your photo looks good, you're ready to hang! Find a place where you can see your beautiful photos every day!
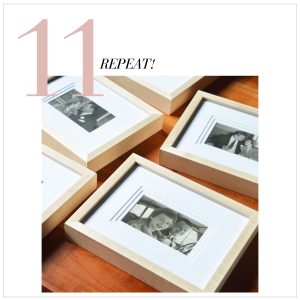
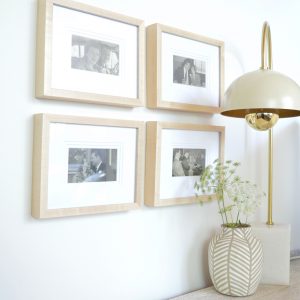
No need to stop with just one photo! Create a gallery wall of your family's photo collection and stop storing these precious keepsakes in storage!
Ready to frame your collection? Start on the custom framing page here and don't forget to share your projects with us! Next week on Le Blog...stay tuned for Part 2 of Framing Your Family Photo Collection. I'll walk you through the process of framing a floating image!
.jpg)
.jpg)
.jpg)