


Gift Guide: Wedding Save-The-Date (Part 3)
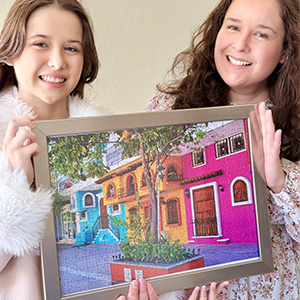
In our final post of the Wedding Gift Guide How-To, I'm putting together a step-by-step tutorial for simply matting a traditional save-the-date with a border. This style is easy and doesn't require any additional materials, so it's by far the least expensive route to go for this extremely thoughtful gift - the save-the-date below came to just $43. That might be the least I've ever spent on a wedding gift but by far the most thoughtful.
First, if you wish to matte the save-the-date over their borders, you can custom frame the invite to fit perfectly under a single, double, or triple-layered mat. Here are the steps to take if this is your preferred framing style. Let's get started!
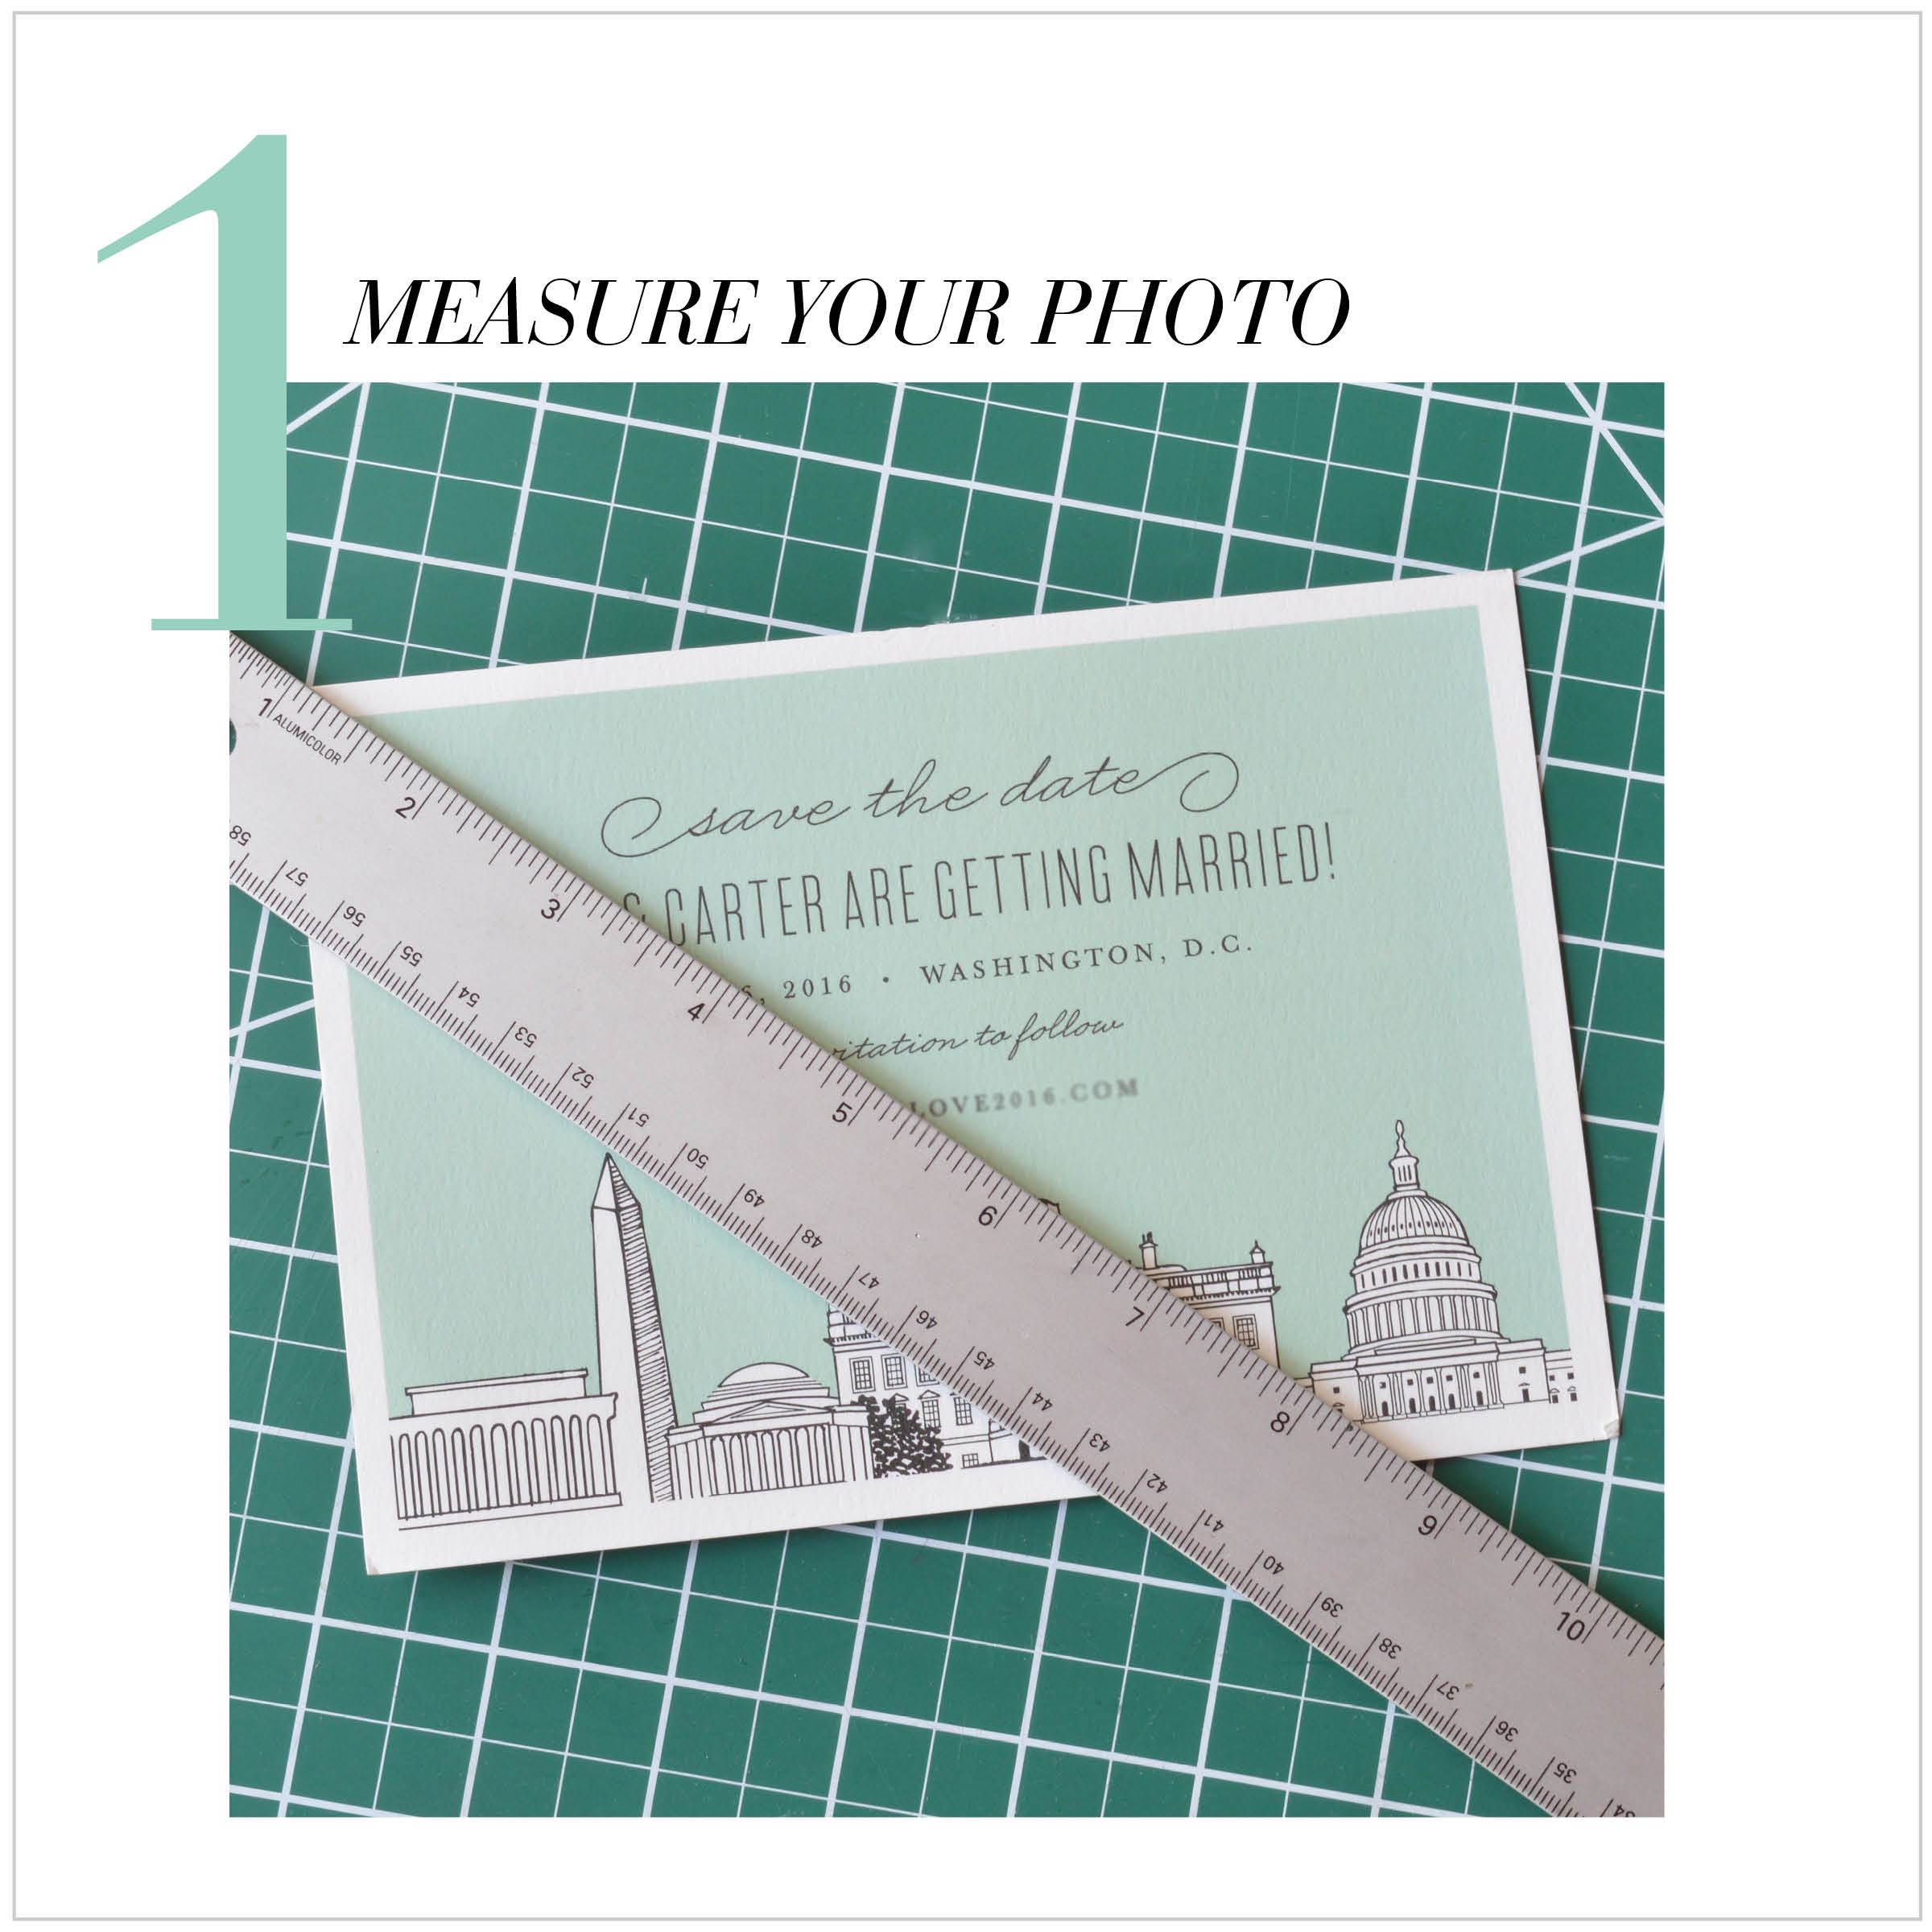
For a matted image, measure the length and width of each photo just inside the borders this is where the mat will sit to perfectly cover the border. This is the measurement you will insert into the Opening Size option when creating your custom frame.
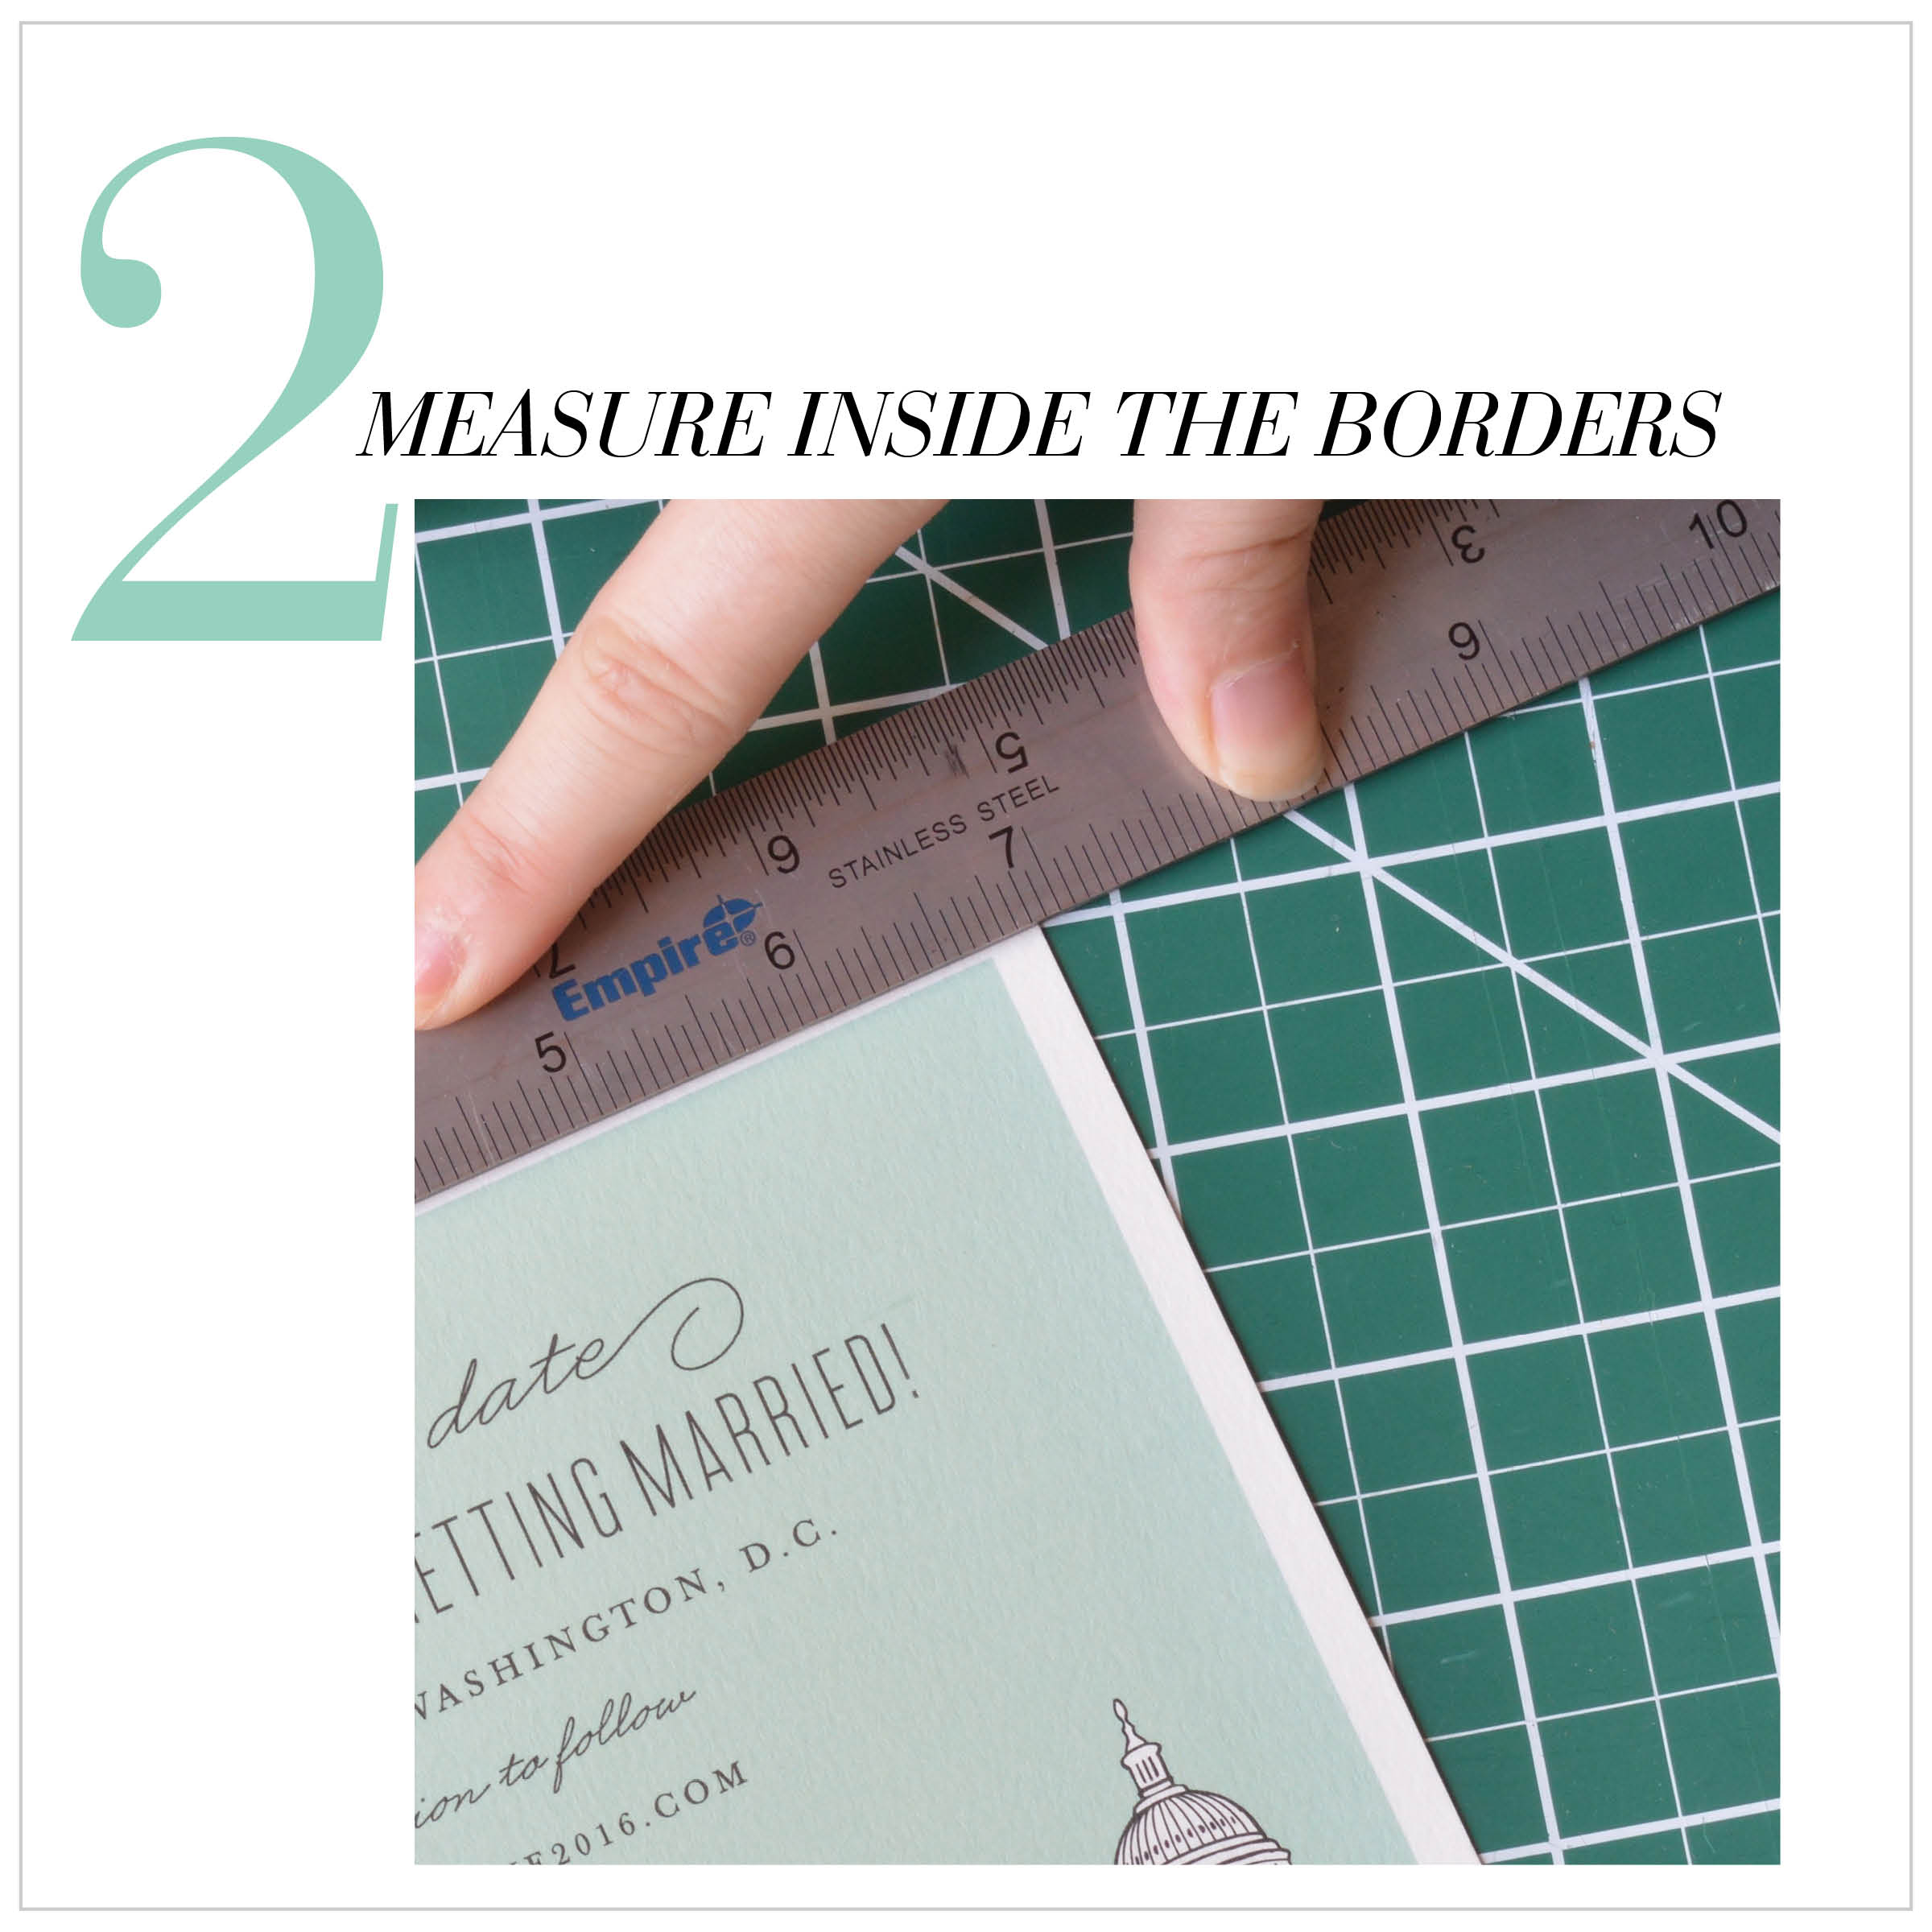
For a matted invite, the Opening Size should measure the total image size as outlined by the borders. If you measure beyond the borders, the mat will expose the border and the project won't look as clean. The Opening Size for my project came to 6.5 x 4.5.
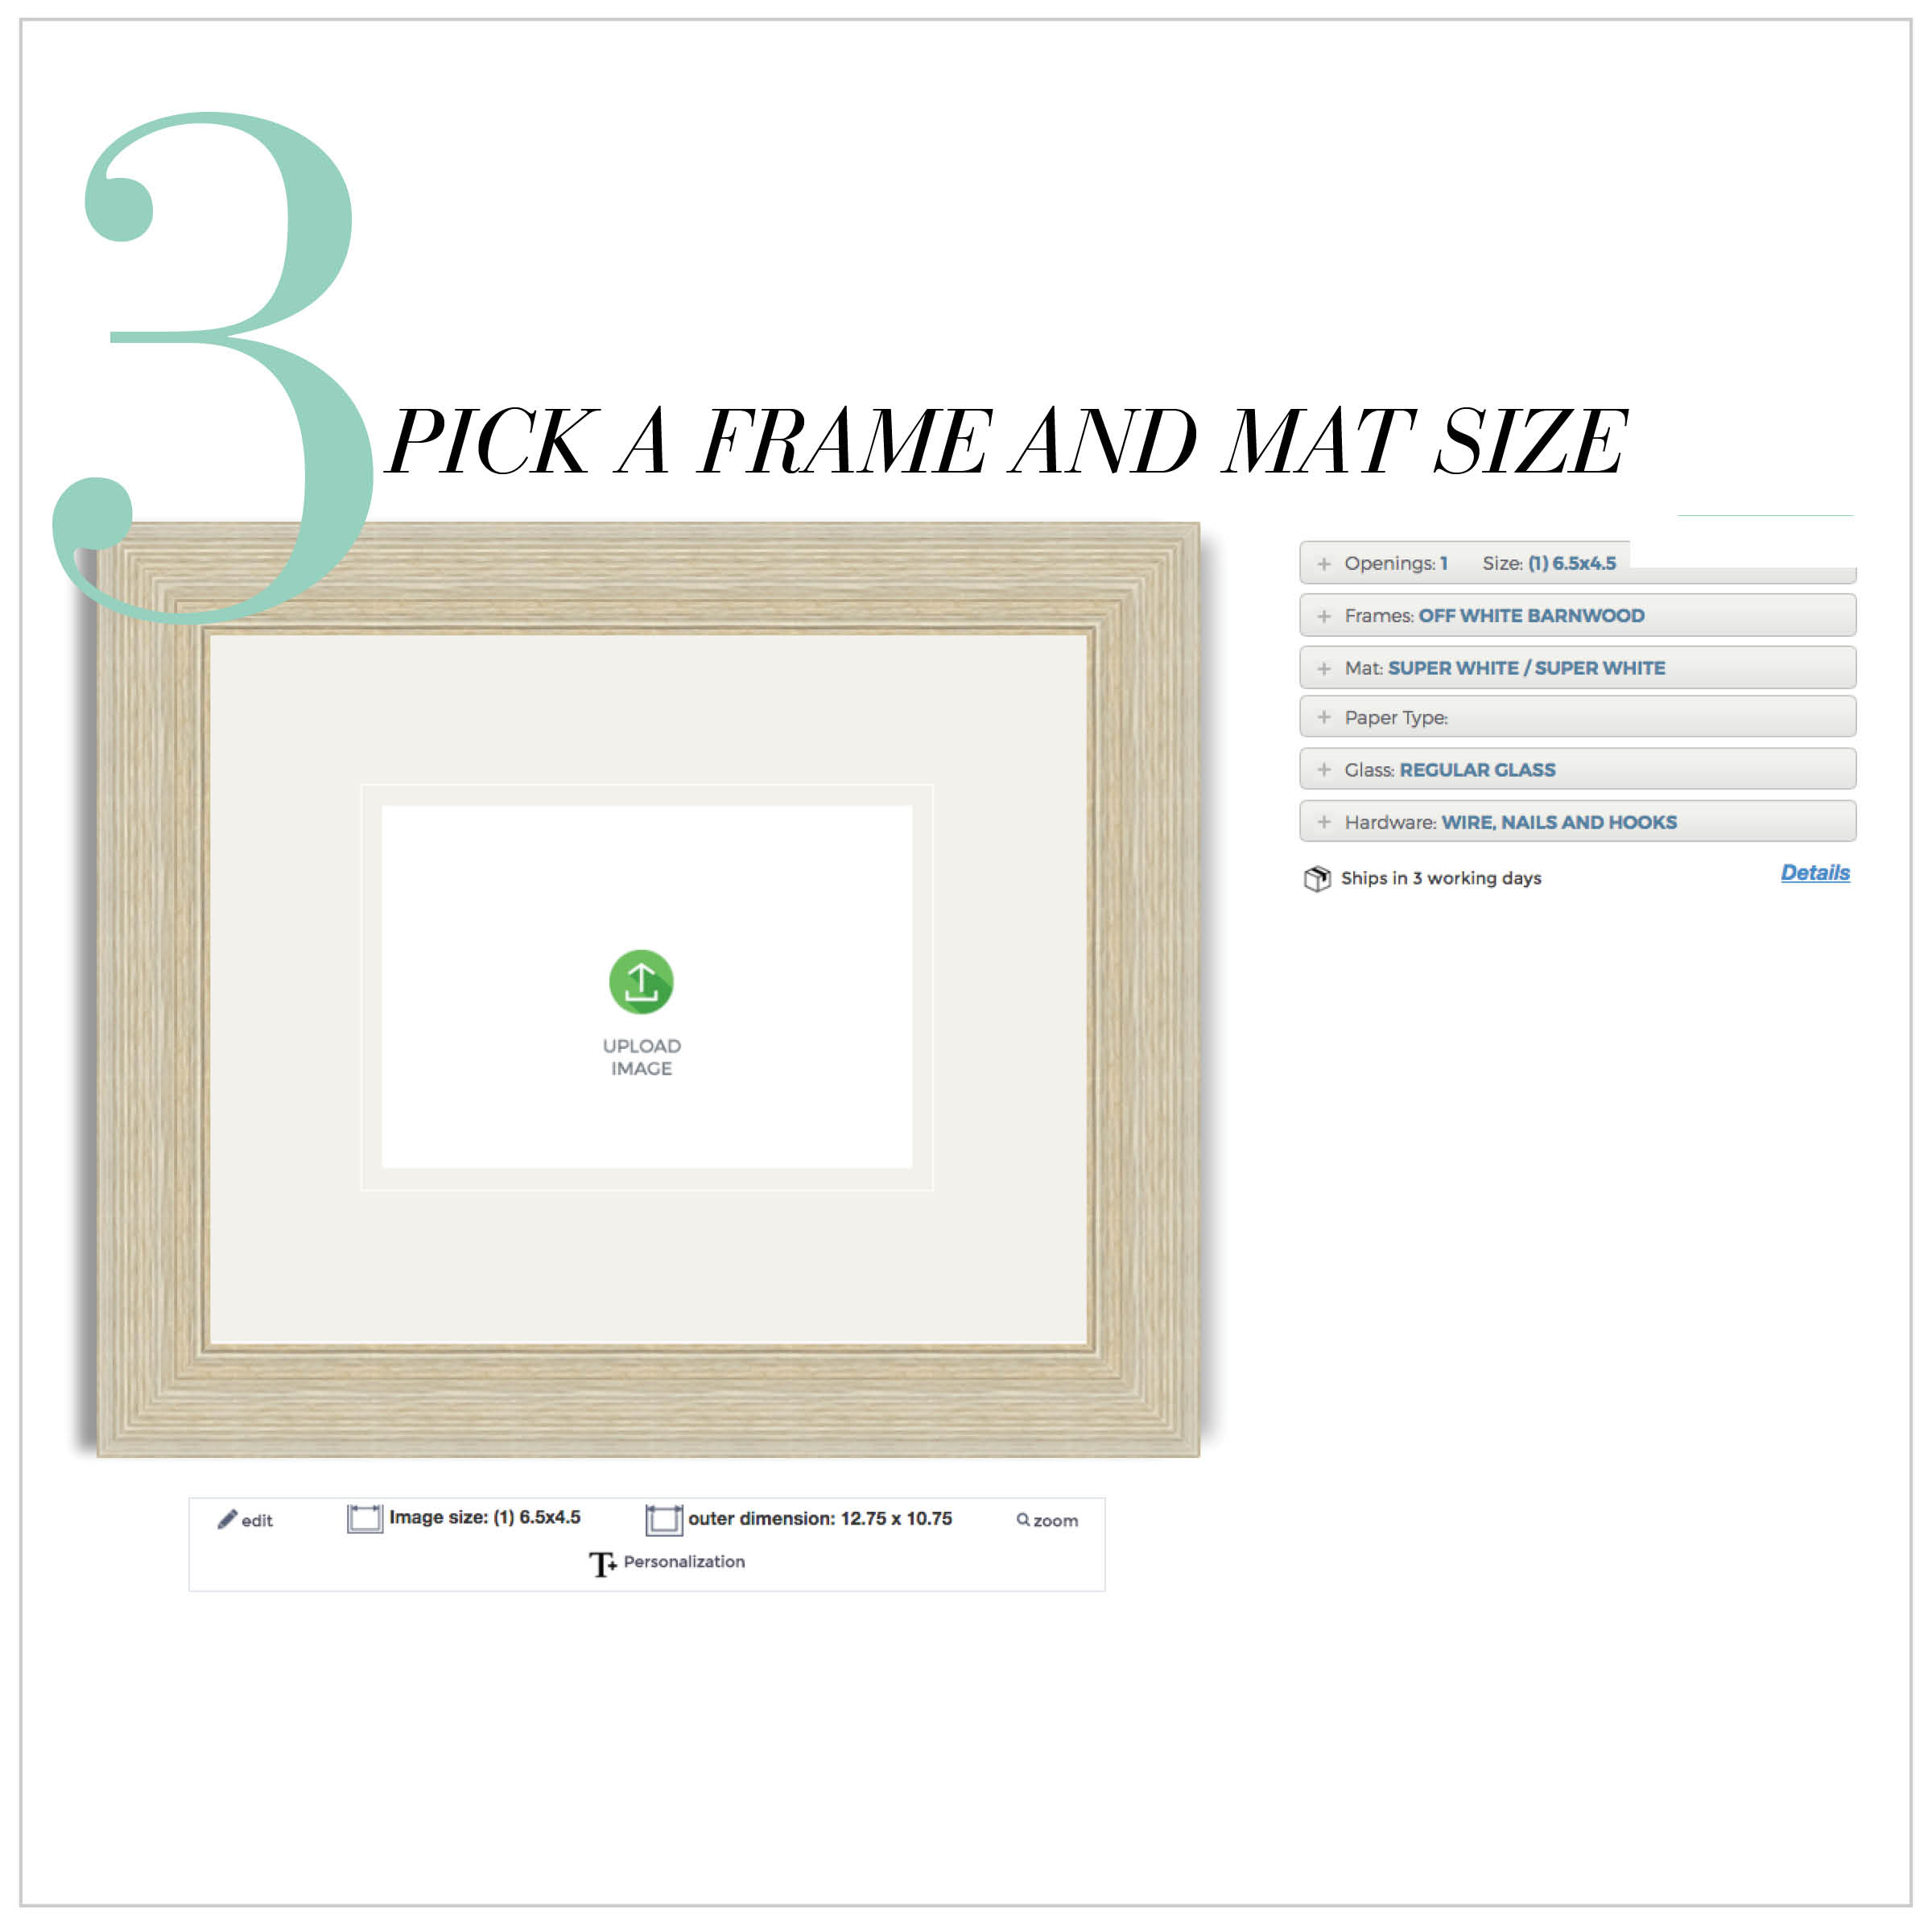
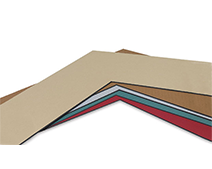
For this invite, I chose a Super White Double Mat with a Natural Barnwood Frame. A white mat with a neutral frame is a great choice to let the invite pop. The natural Barnwood frame has an amazing texture to add to the invite without stealing focus. Want to recreate this look? You can find the Barnwood frame in our Barnwood Picture Frame Collection!

When your frame arrives, remove the backing and gather supplies. For a matted frame, you'll need the frame, mat, backing, invite, and tape. (For my project, I chose to use painter's tape which will hold the photo in place but can be easily removed without damaging the invite)
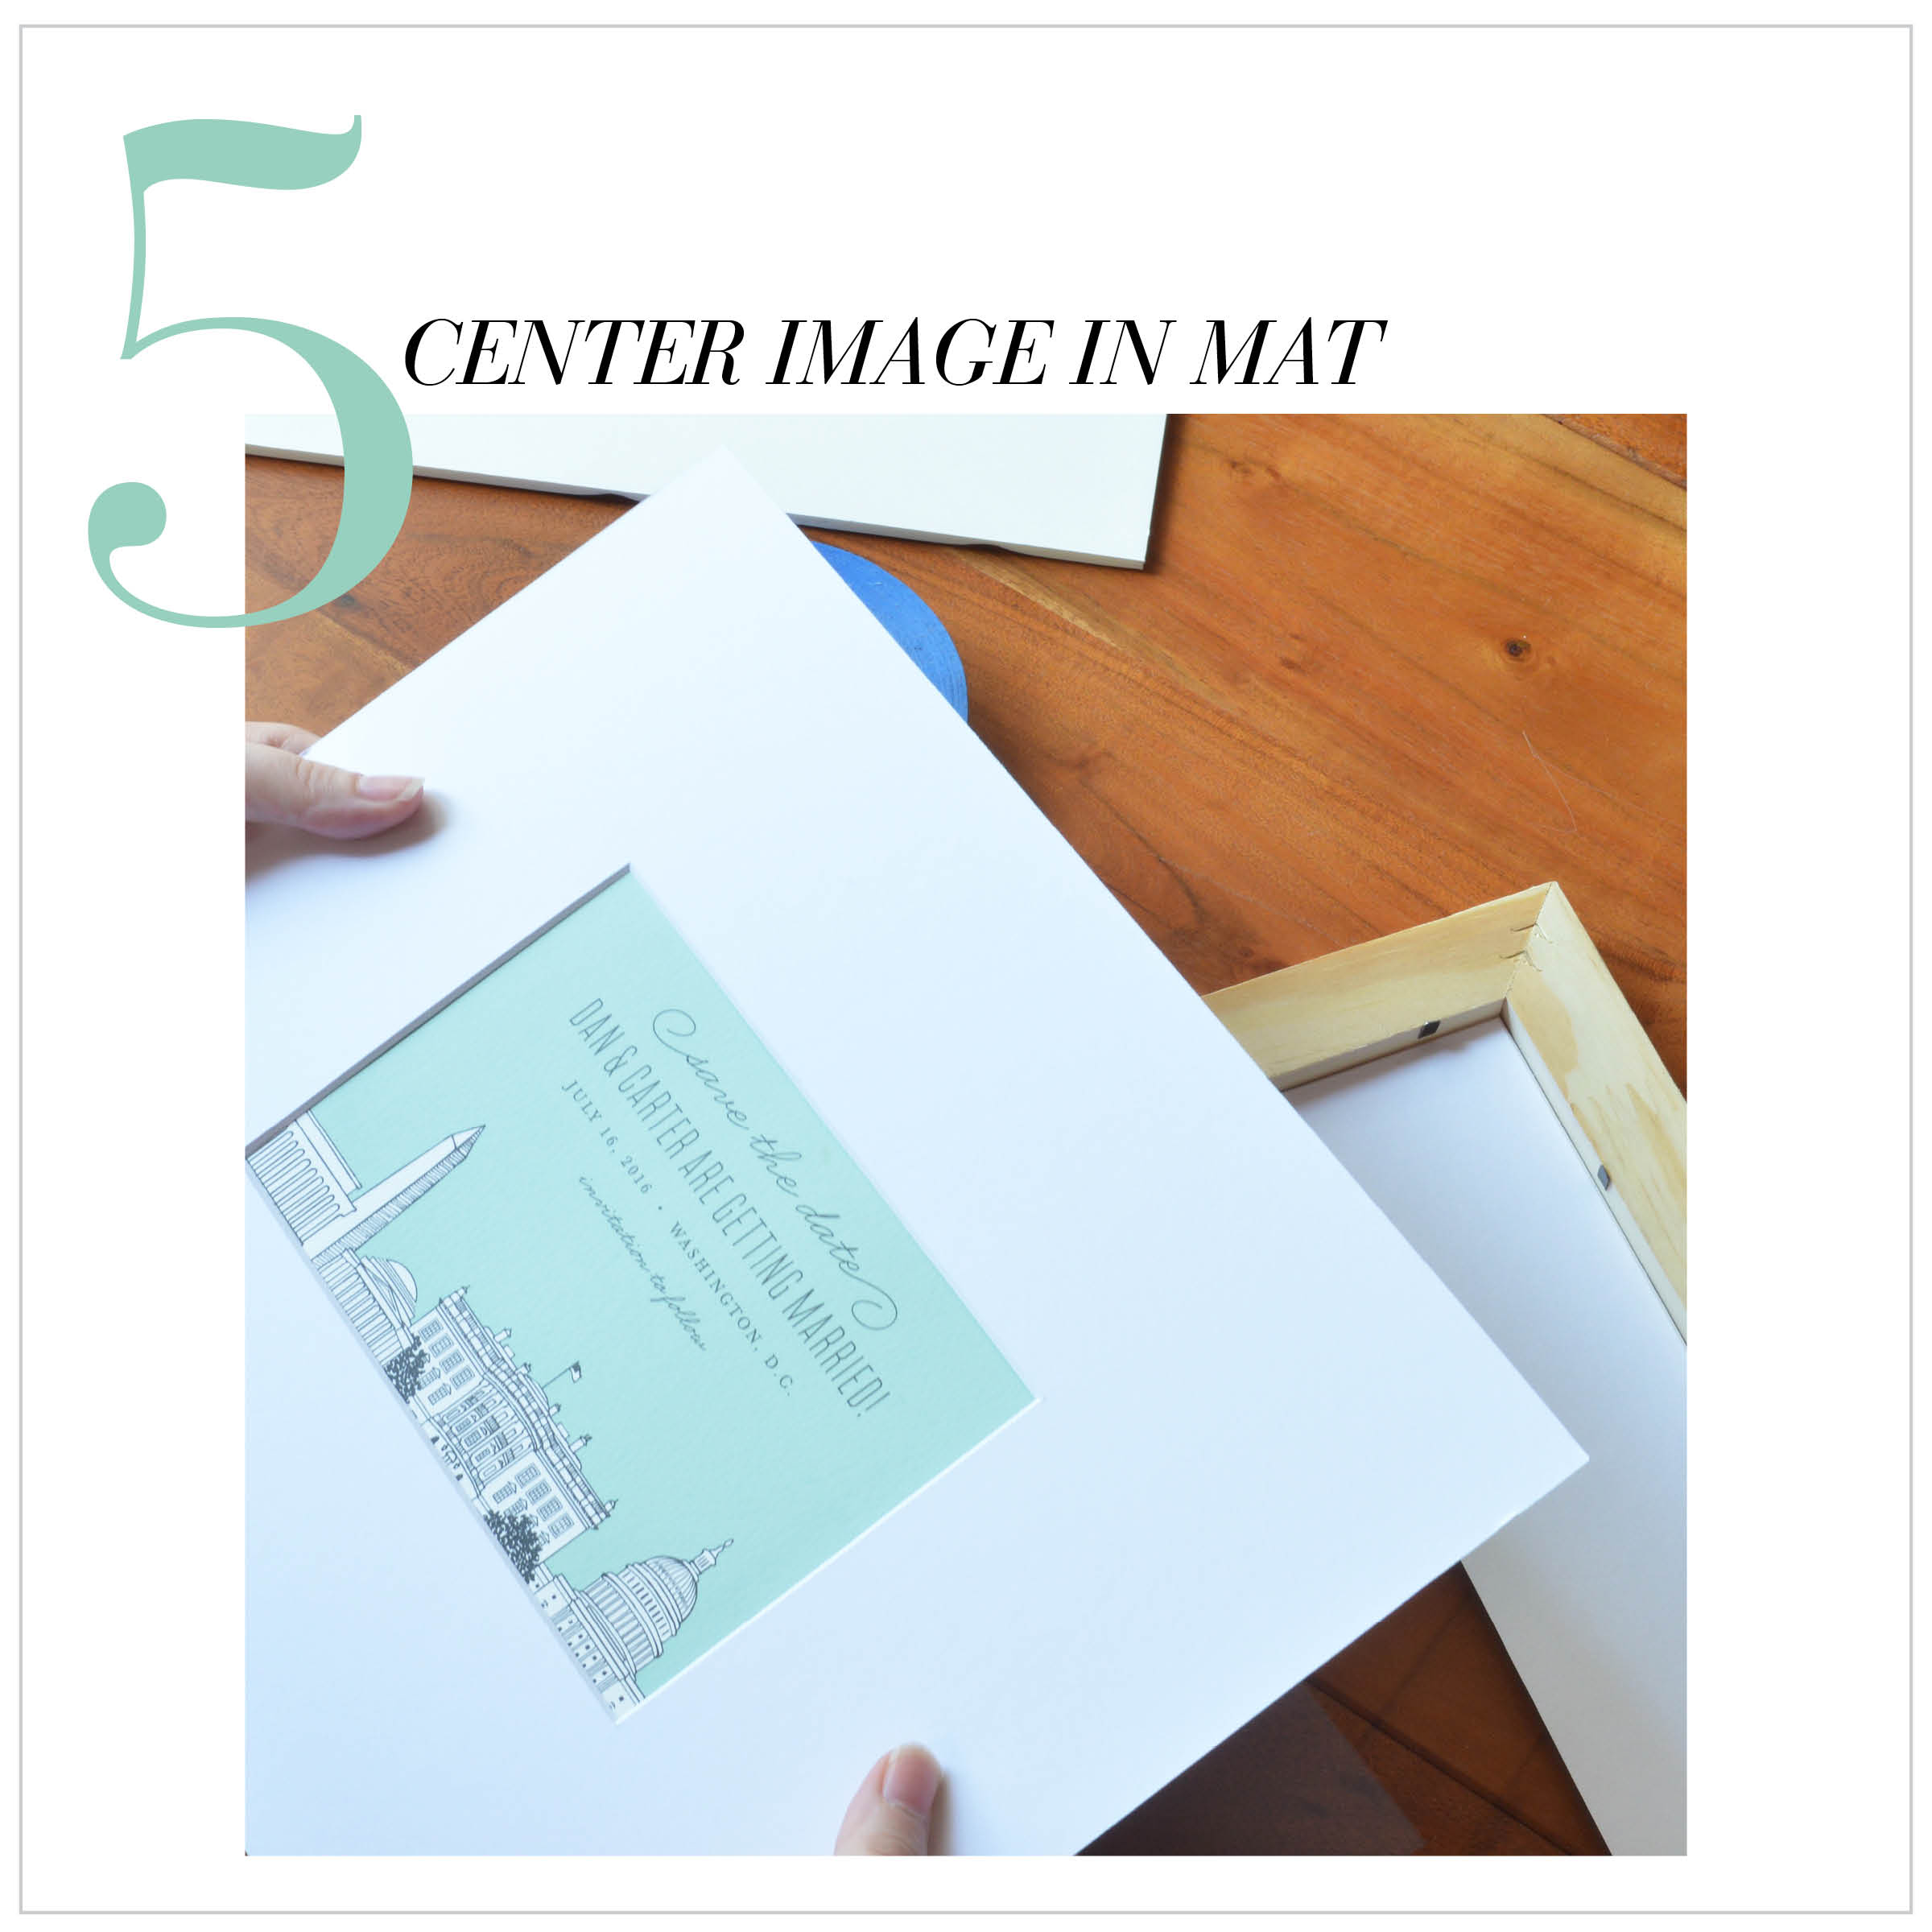
Place the invite behind the mat and align it to hide the frame borders. Position straight and hold firmly to assemble in place.
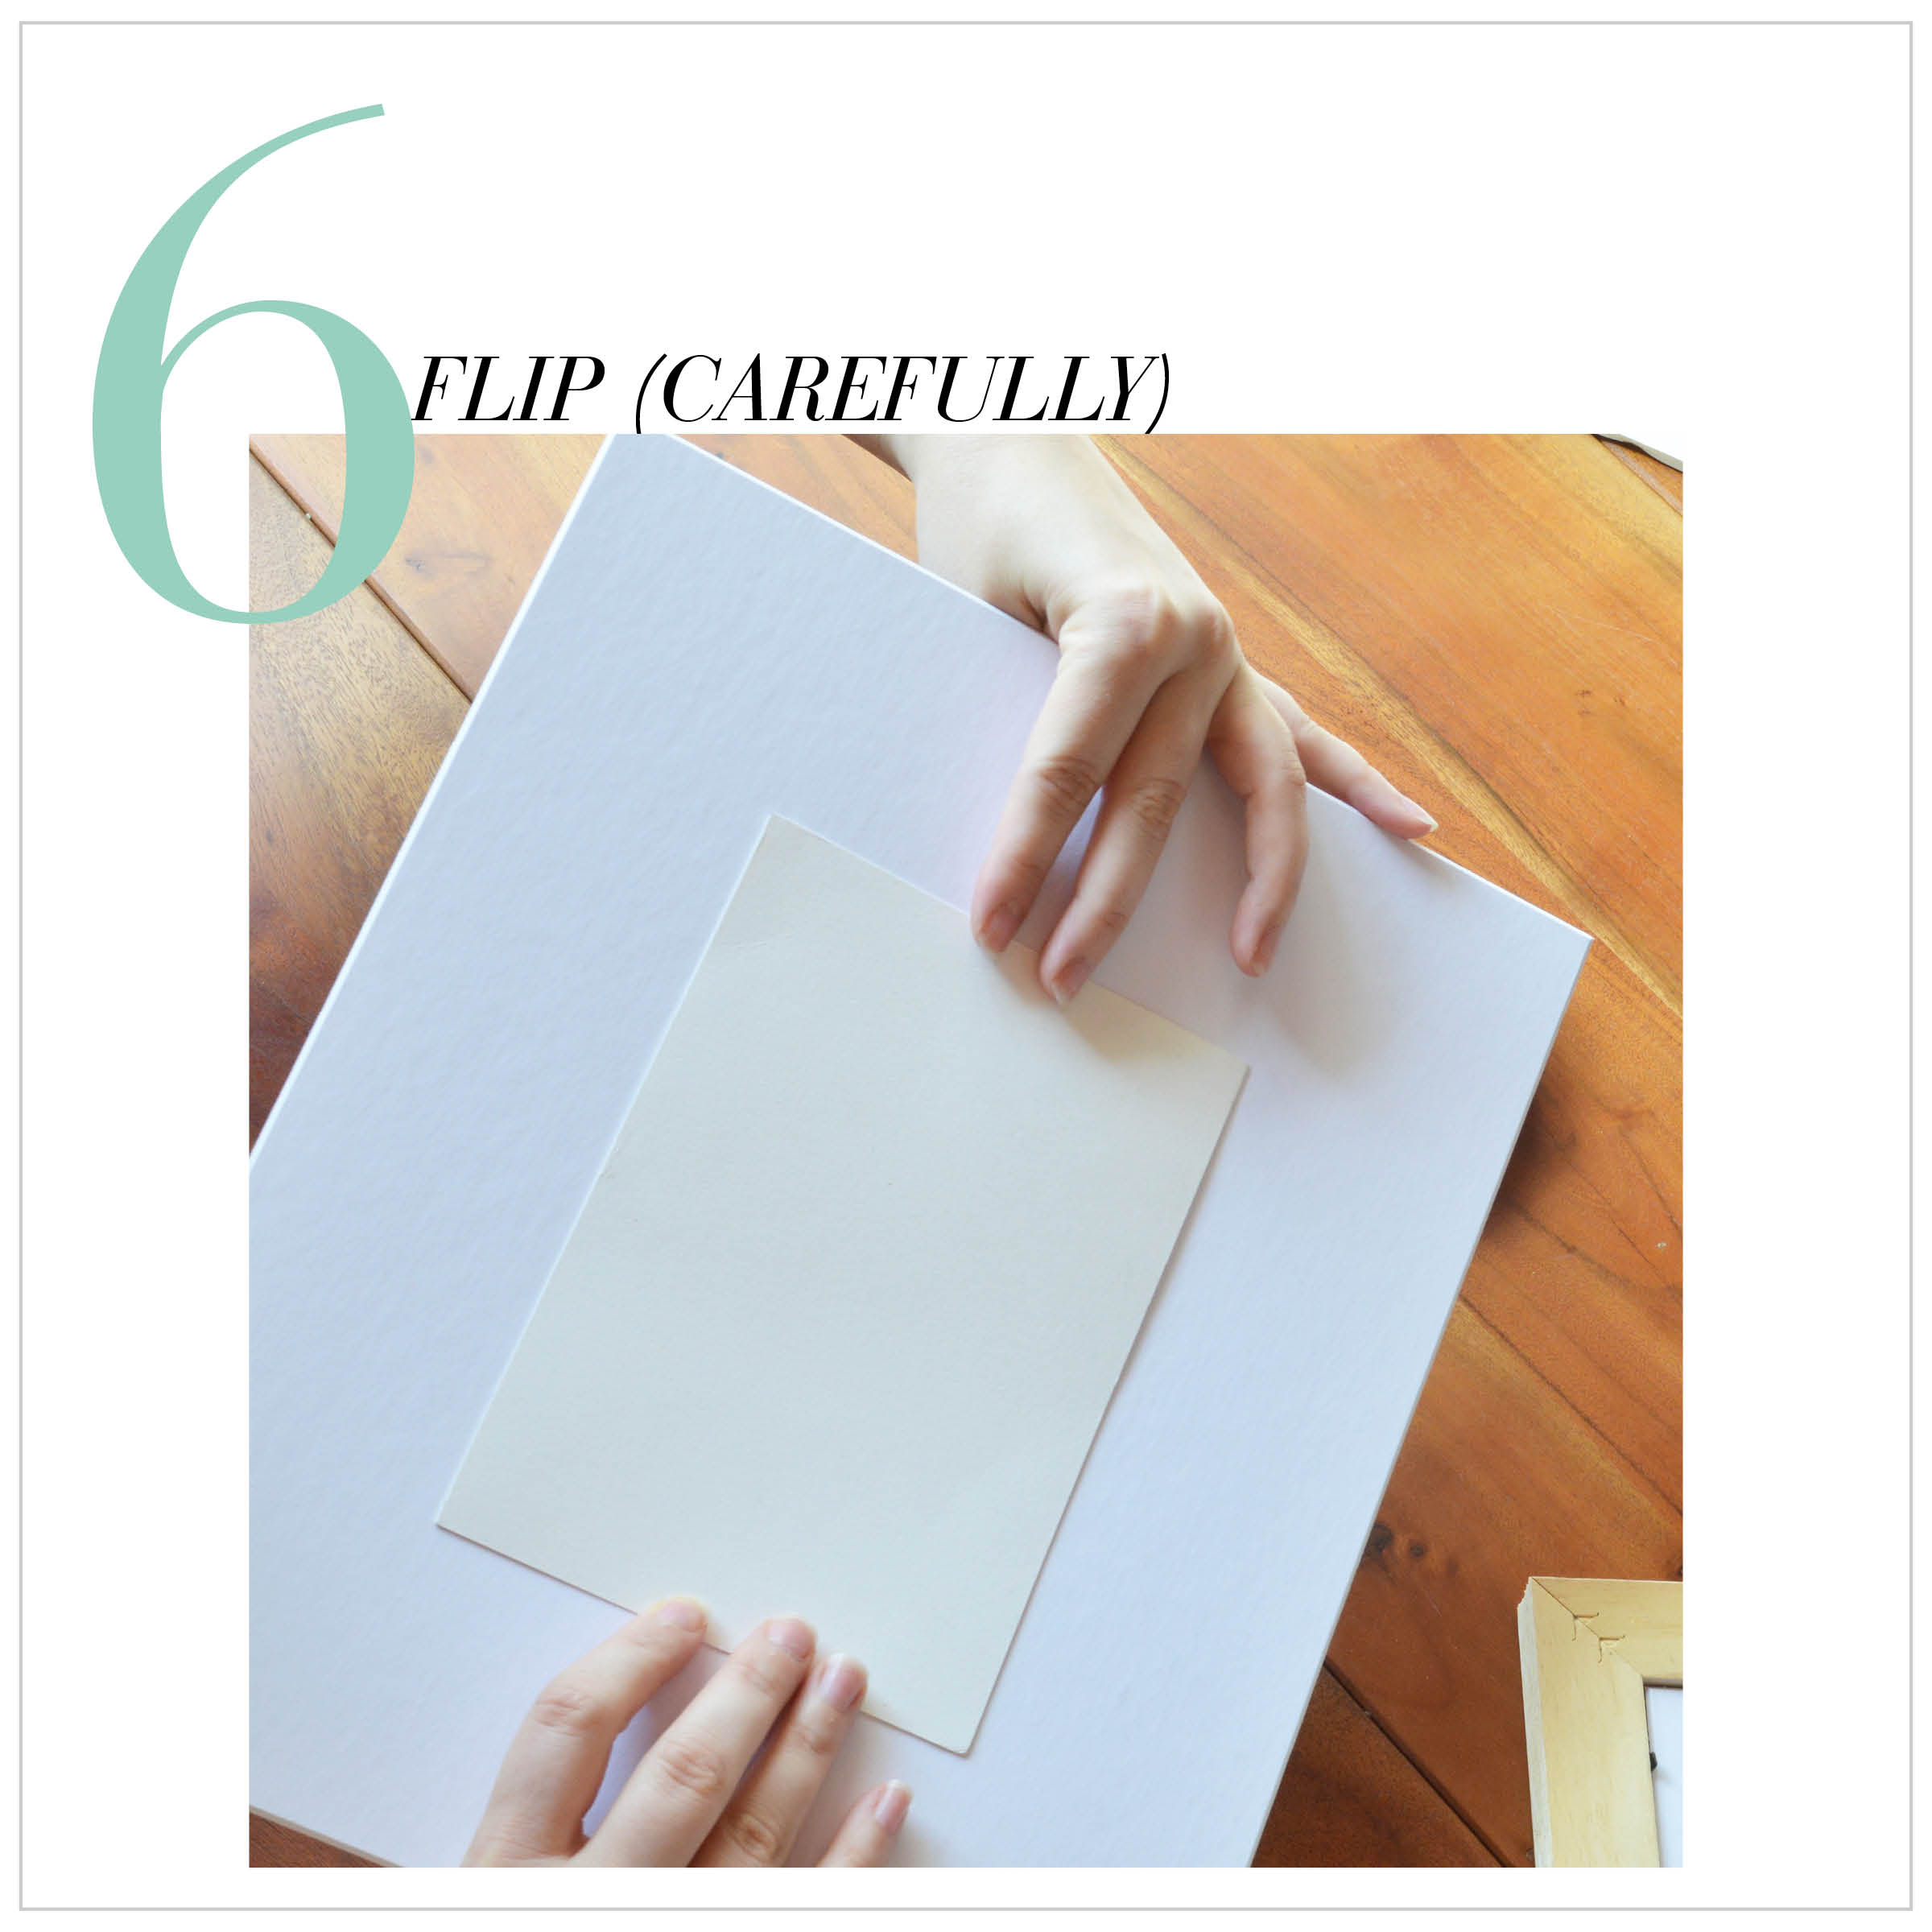
Once you have your invite positioned the way you wish to display it, carefully flip the mat over. Try to avoid moving your fingers or sliding the photo out of place.
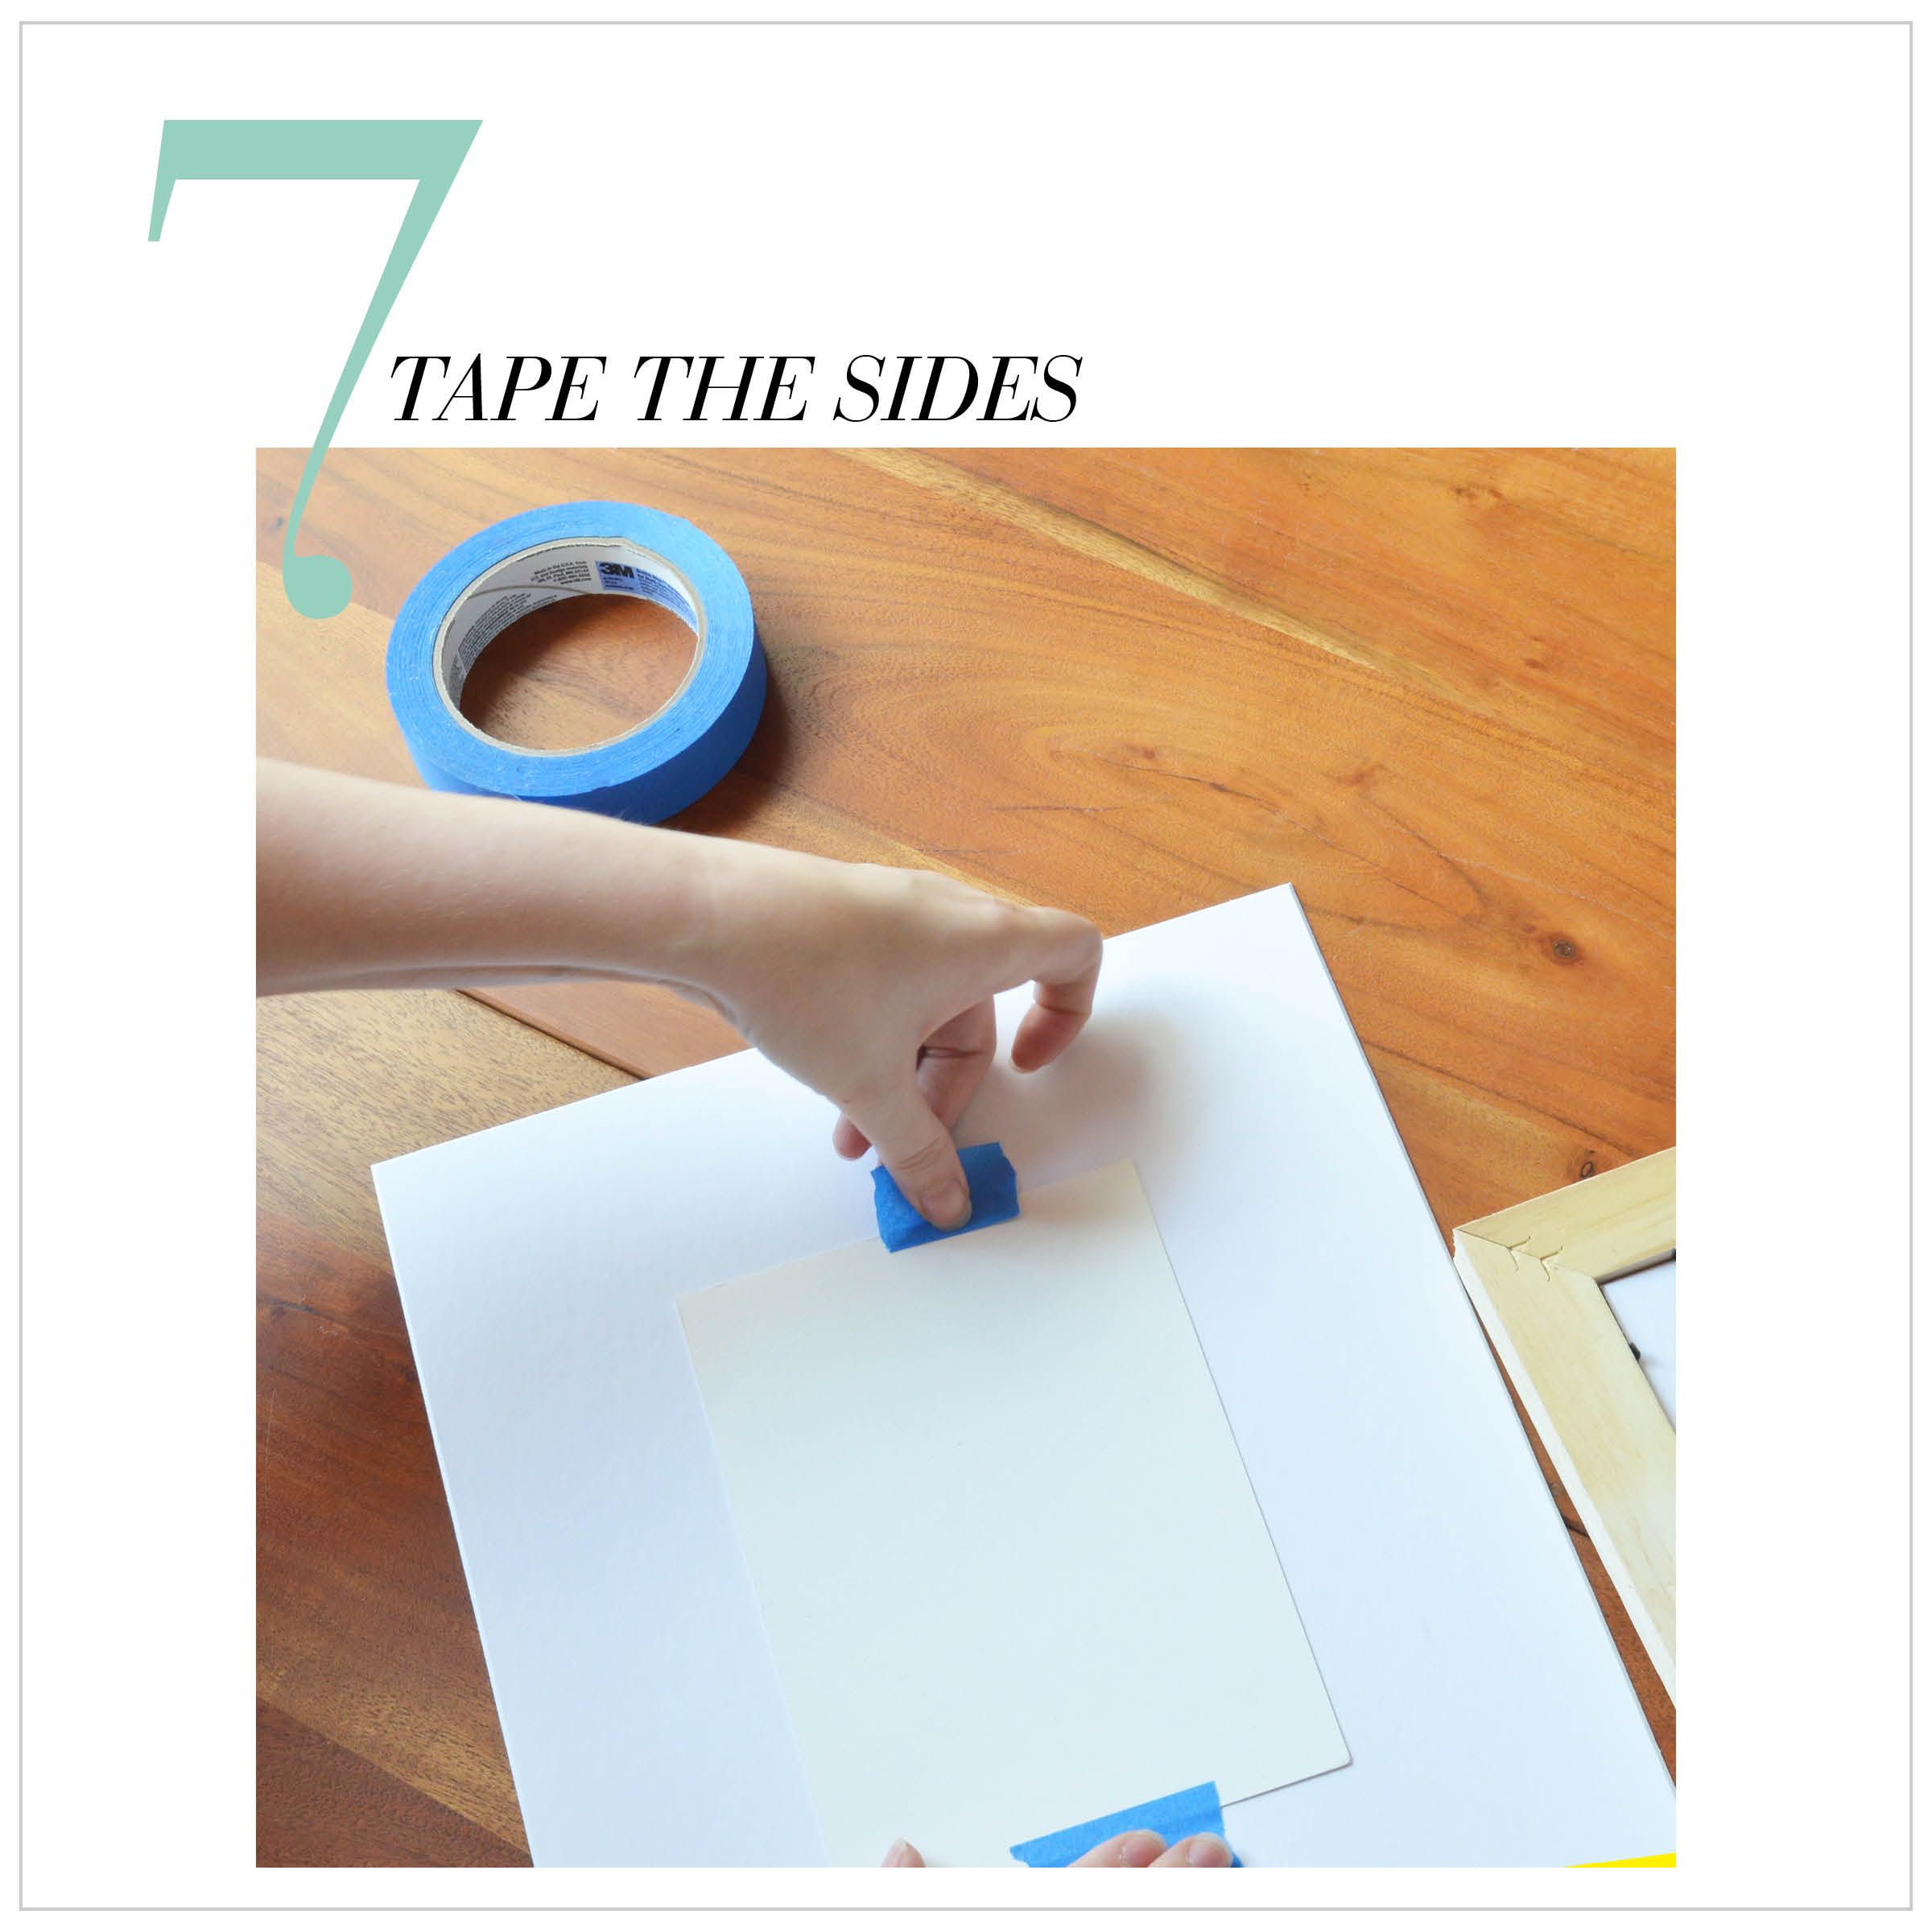
On the back of the mat, place two pieces of tape on the sides to secure it into place.
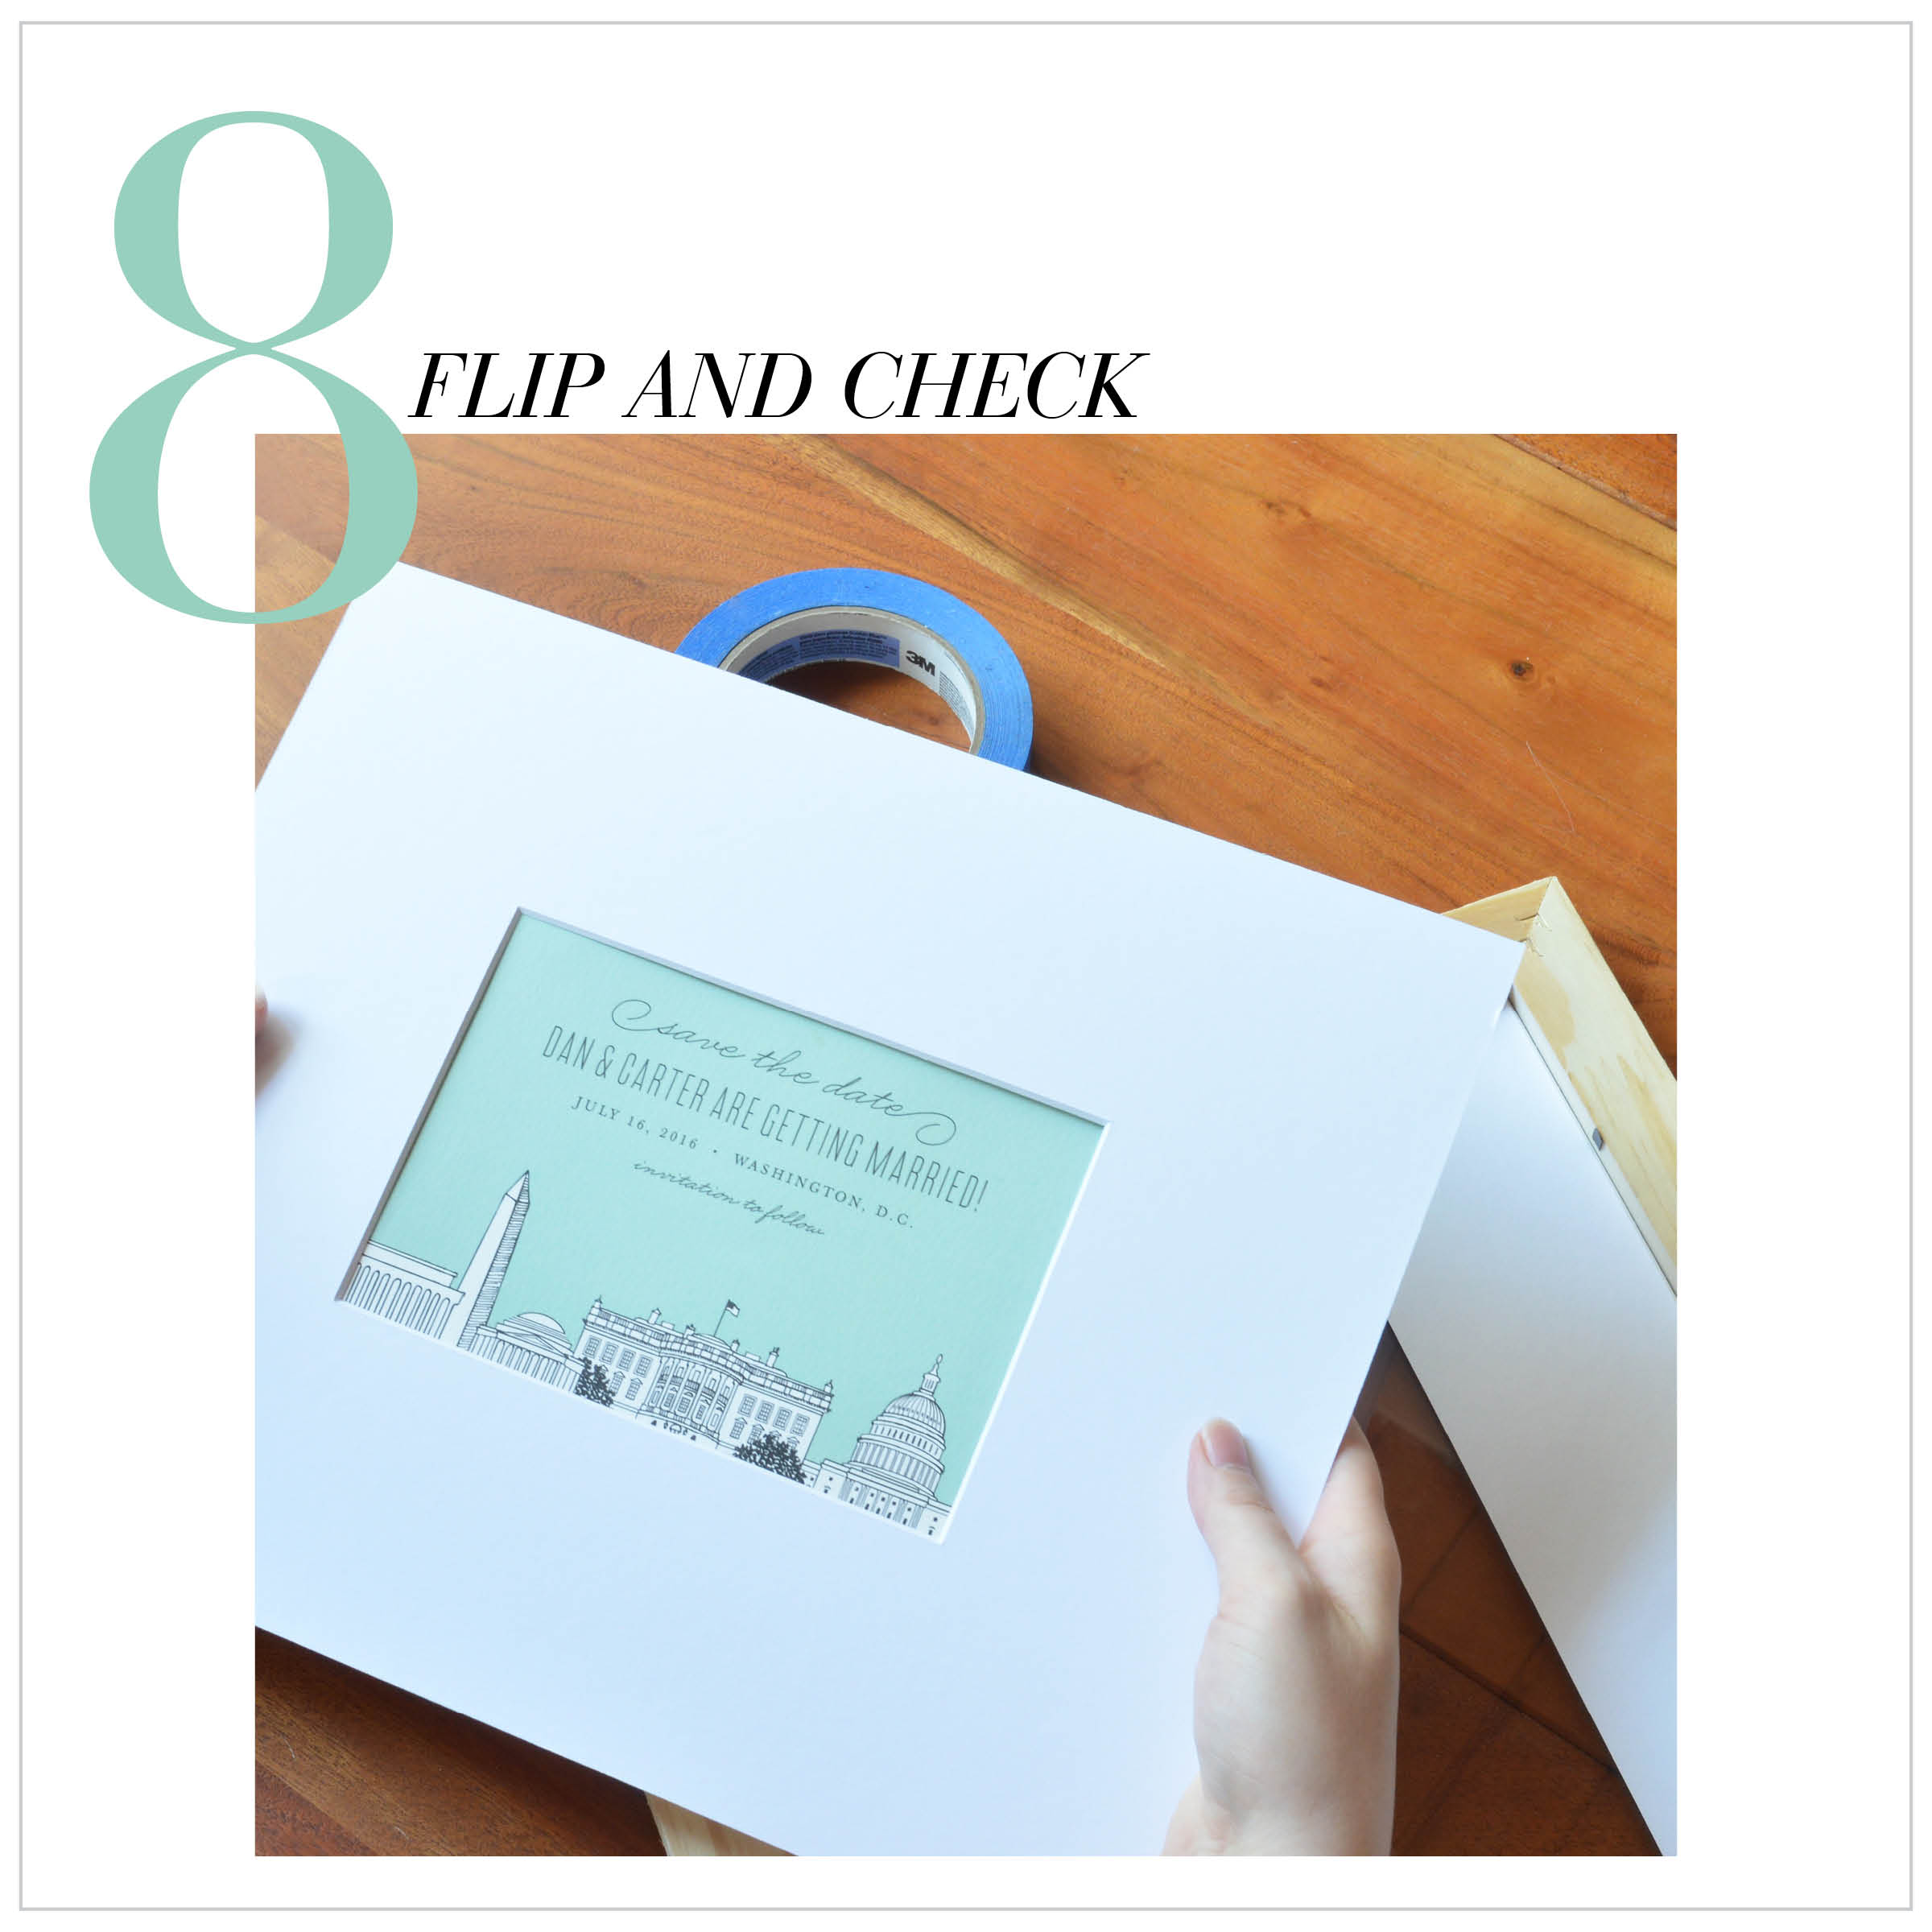
Flip the mat board back over to make sure your invite remained perfectly aligned with the mat. If it shifted during the process, this is the time to repeat steps 6 and 7.
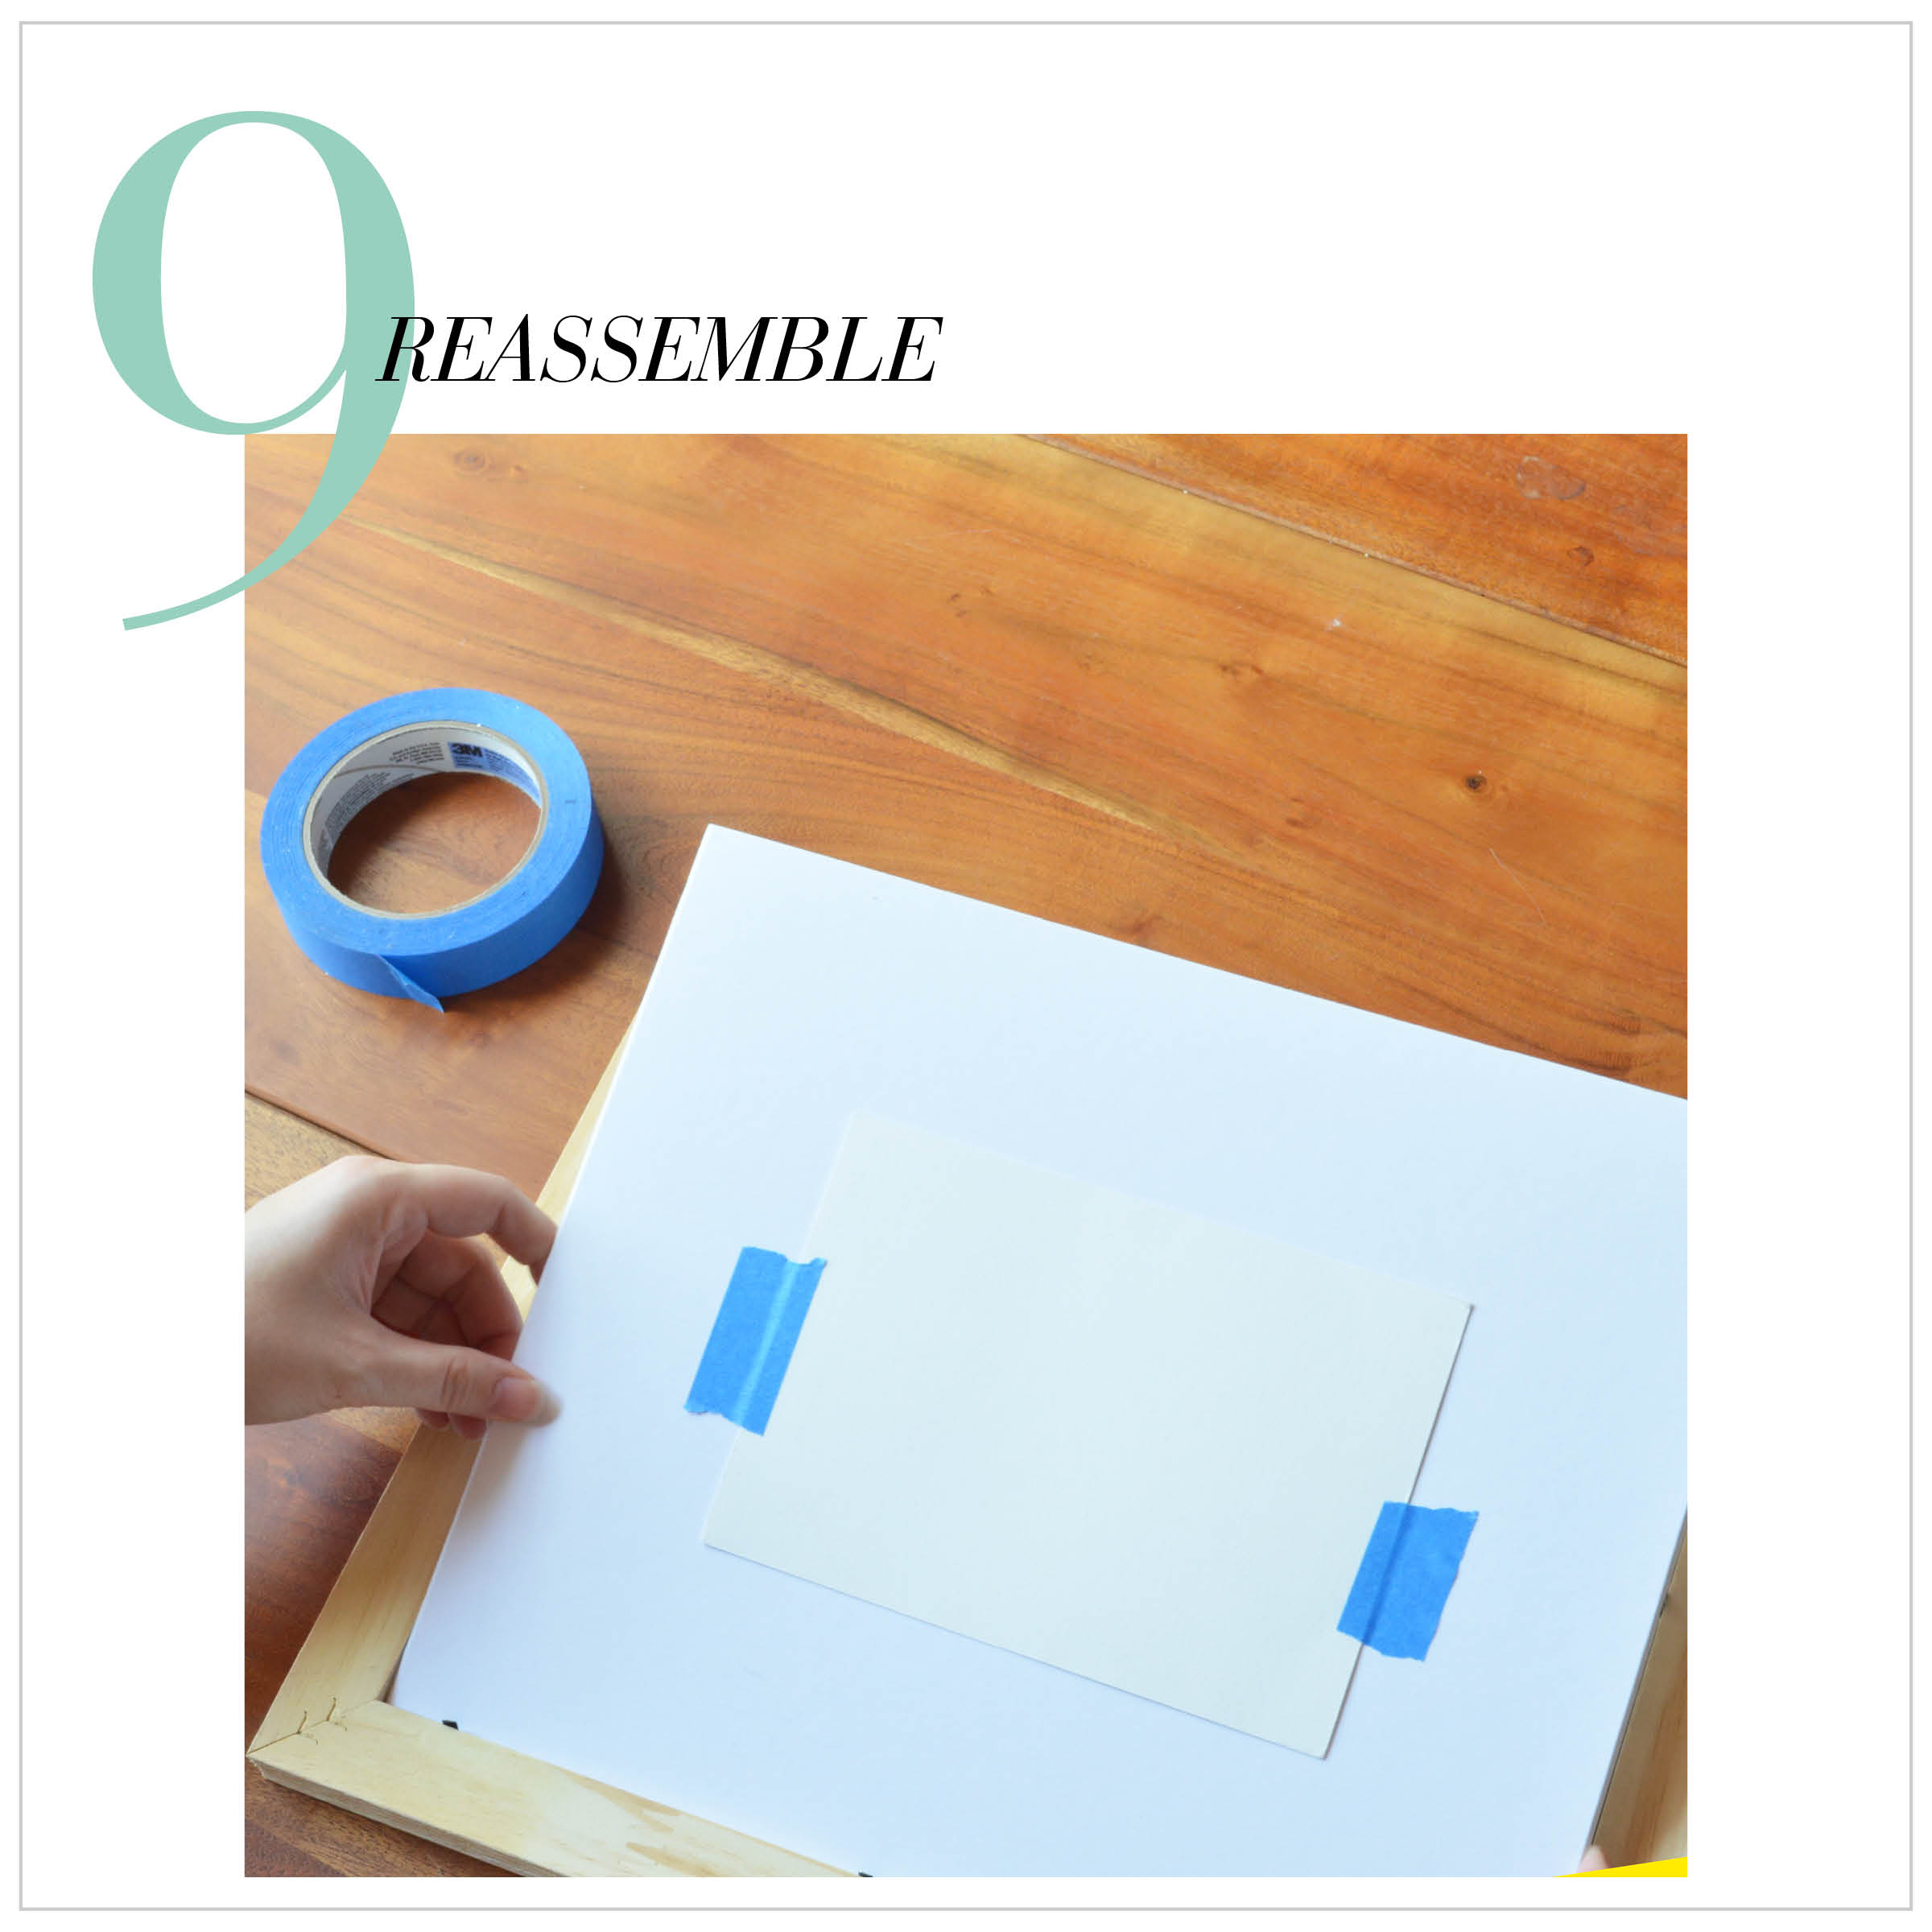
If your invite looks aligned, it's time to reassemble in the frame! Be sure to clean the glass on the interior of the frame to keep dust from dirtying the photo and mat. Once your glass is clean, place the mat and backing into the frame and secure the back tabs to hold everything in place.
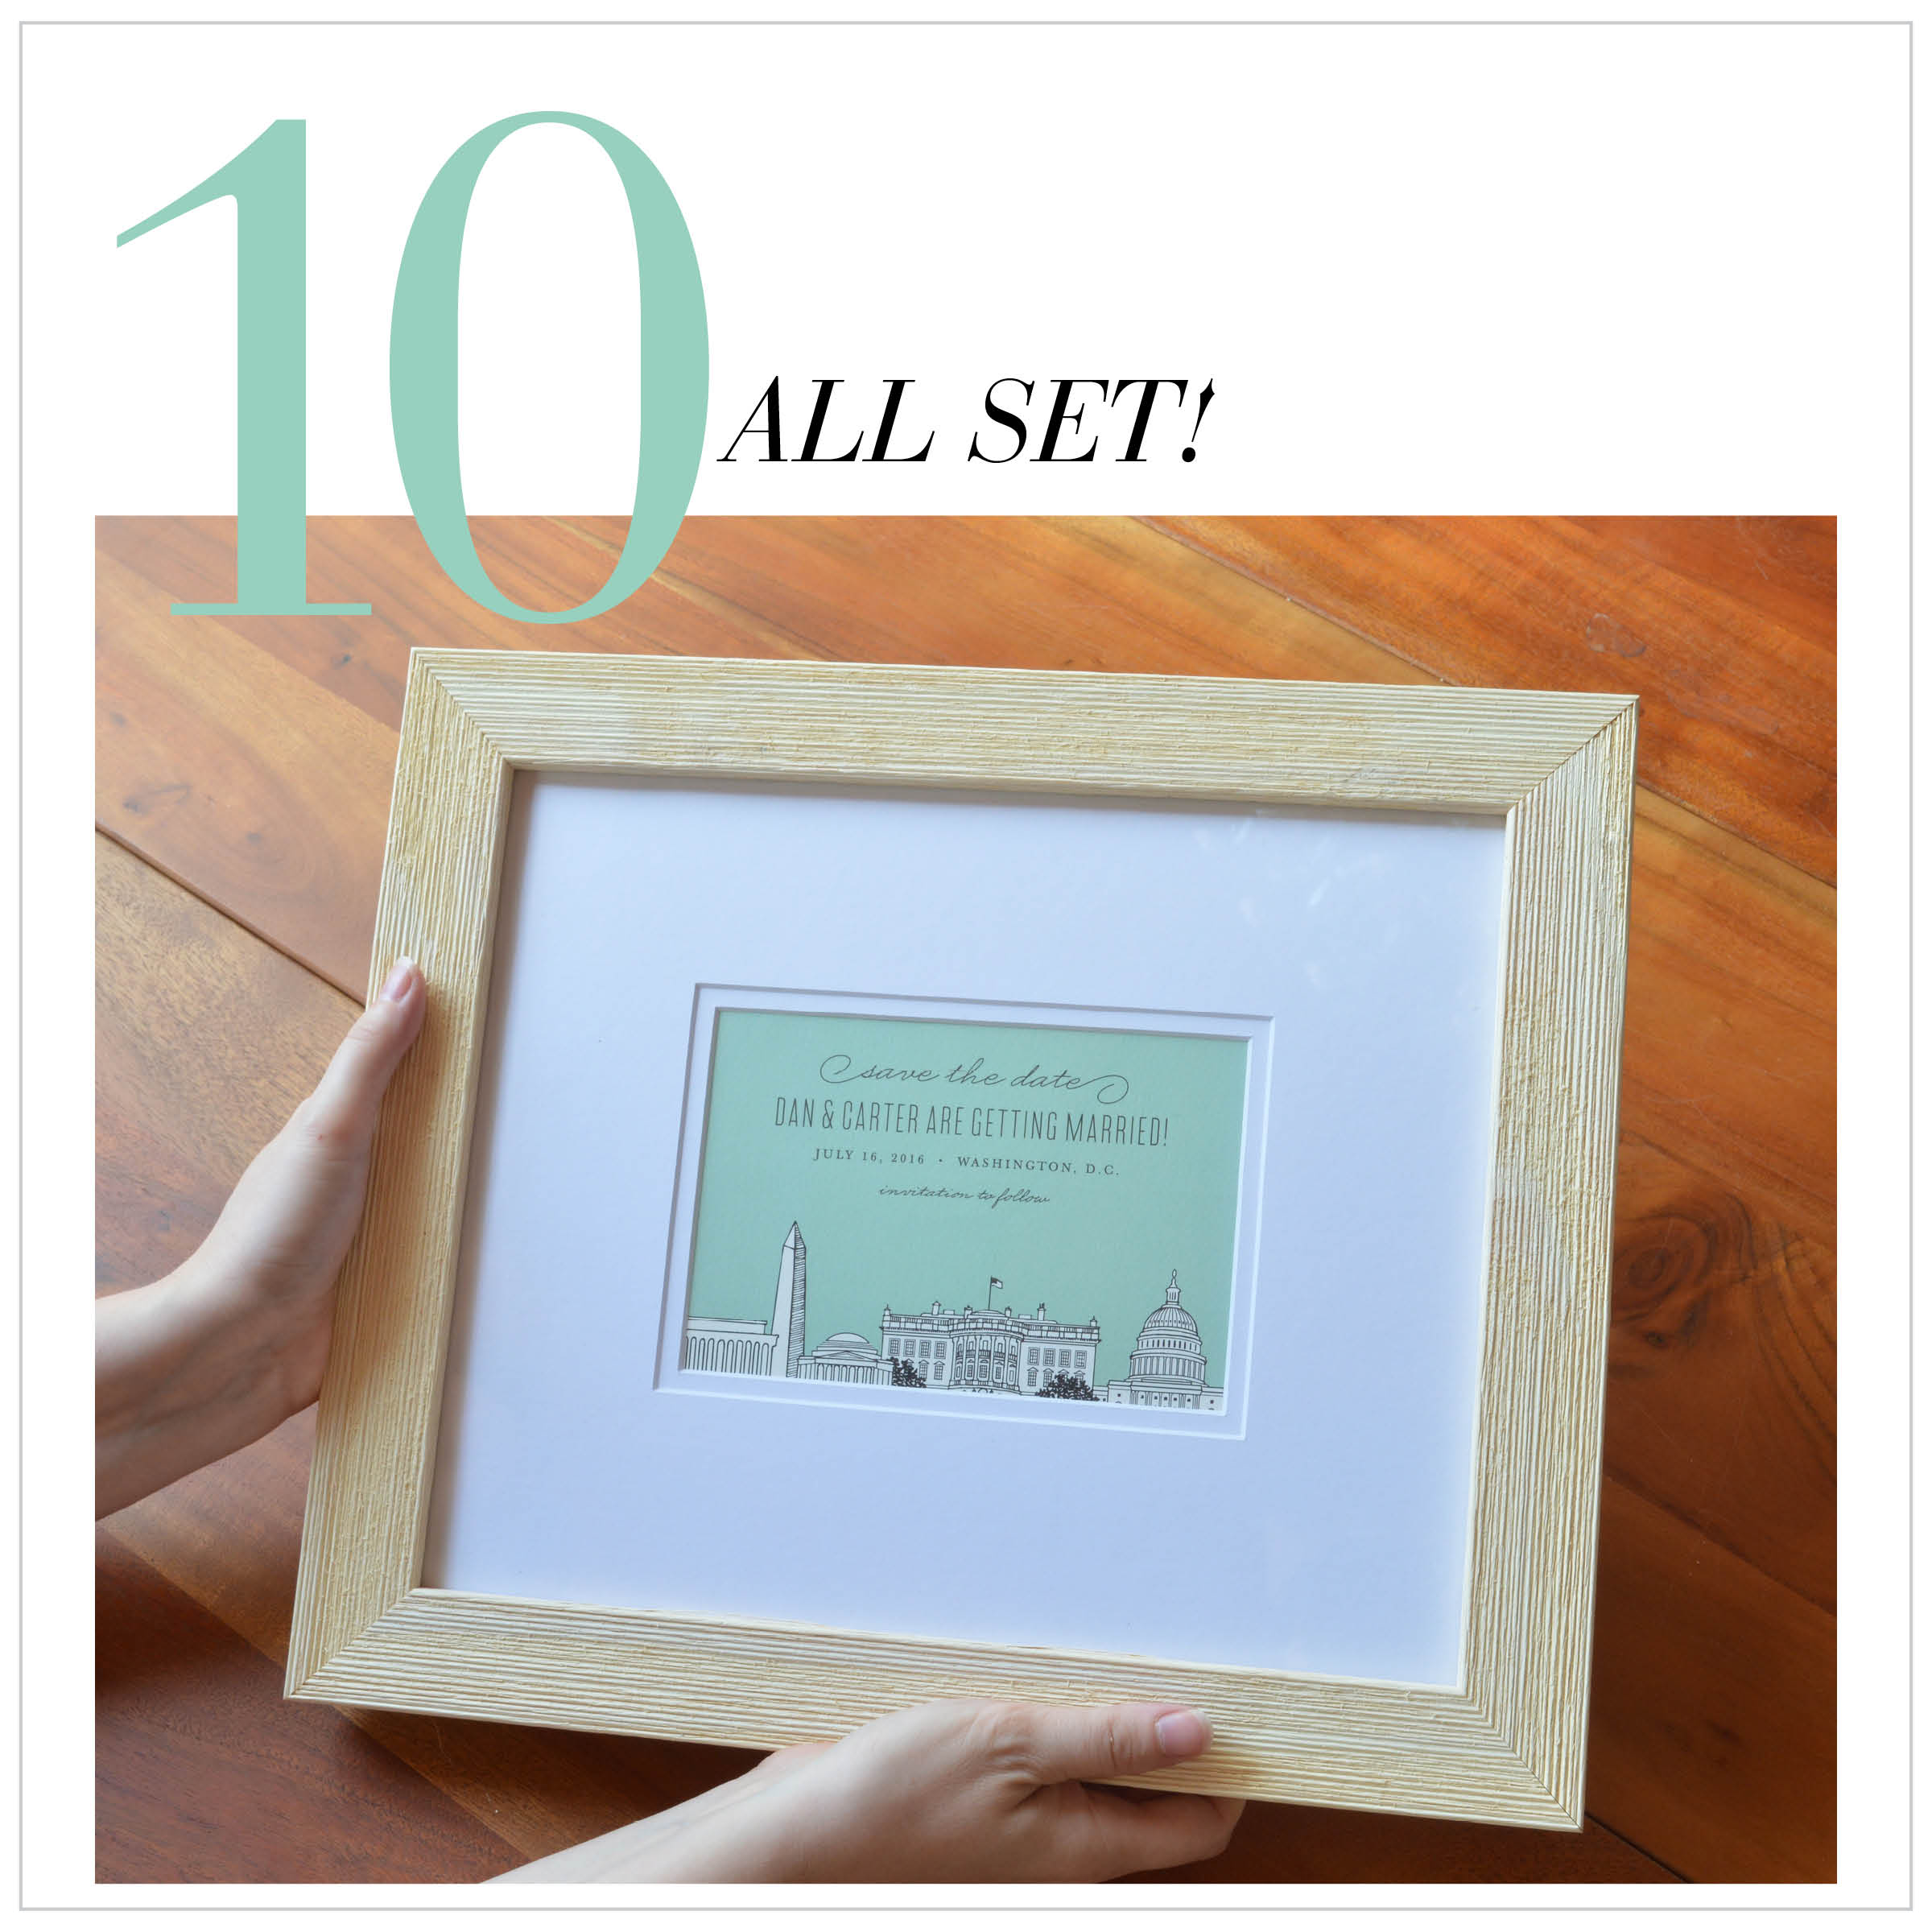
If the invite looks good, it's ready to send to the happy couple! Get ready to be praised for sending the couple's favorite and most cherished gift and congrats on knocking it out of the park by sending the most thoughtful (and cost-effective) gift the newlyweds will receive!